DROP MY PART · IPAD HELP
Learn the app
screen by screen.
Written for everyday musicians who may never have used the app before. Compare each example with the iPad in your hands. Screenshots show sample songs and bands; use your own information.
YOUR FIRST PRACTICE
Begin with one song.
- Tap Start Practicing, then open Songs and tap + to add compatible audio.
- Wait for Stems Ready, then open the song.
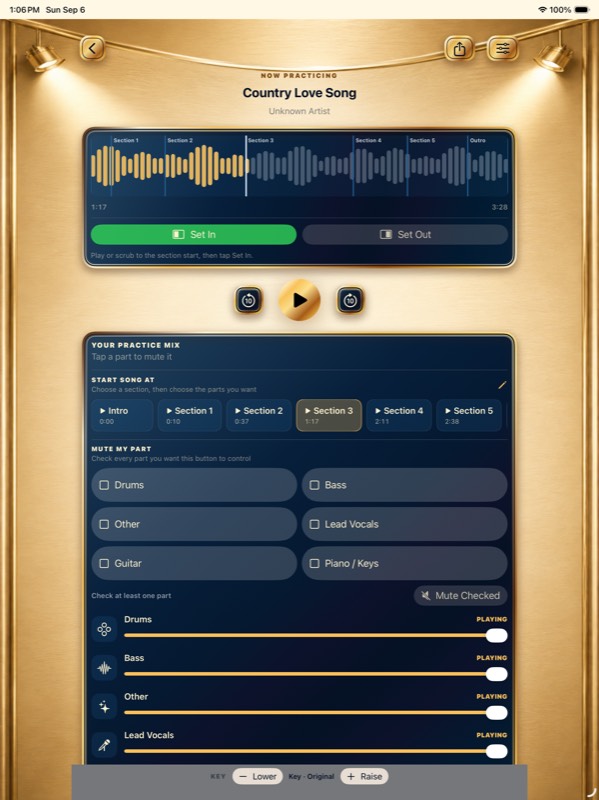
- Scroll to Mute My Part and check the parts you sing or play.
- Tap Mute Checked, then Play to practice with the remaining parts.
- Use the topics below for loops, lyrics, sets, and band planning.
HELP TOPICS
What do you want to do?
TOPIC 01
Start Here: Practice Overview
Your quickest route into a song, adding music, Help, and Settings.
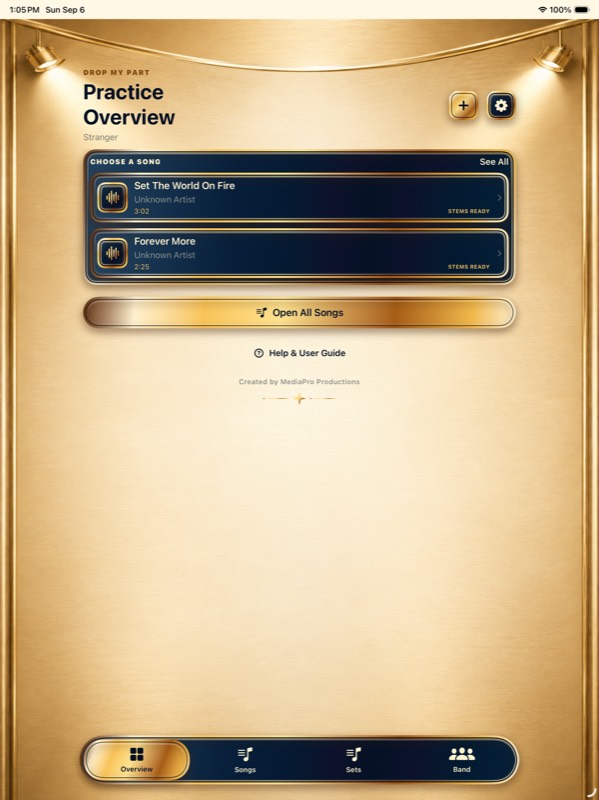
Tap Overview at the bottom.
Begin practice quickly or return to recent music.
Step by step
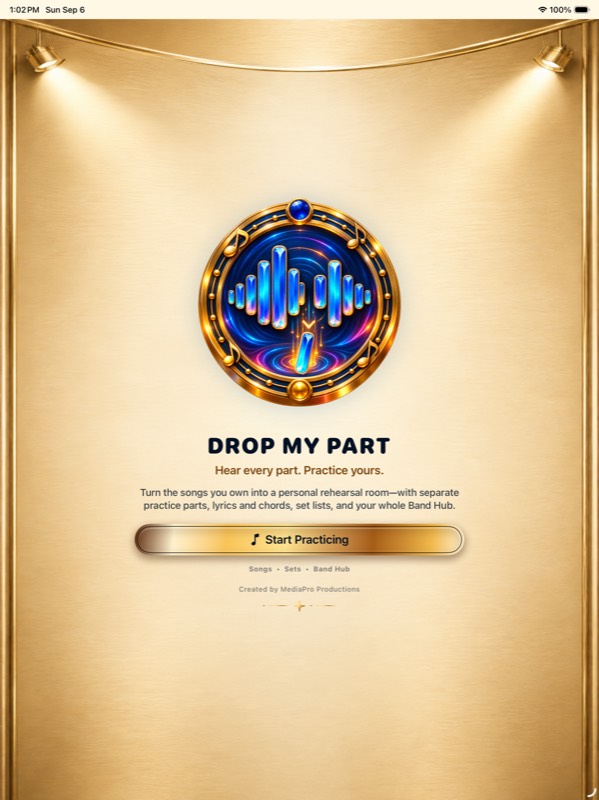
- Tap Start Practicing on the welcome screen.
- Use Overview in the bottom navigation to return here.
- Tap a song under Choose a Song, or use See All / Open All Songs to find another.
- Tap + to add a song. Open the gear for Settings or Help & User Guide for instructions.
TOPIC 02
Find Answers in Help
Search plain-English directions stored inside the app.
From Overview, tap ? or Help & User Guide.
Find a control or understand a feature before changing anything.
Step by step
- Search this guide for a word such as song, set, lyrics, or report.
- Tap a topic to open its instructions and screen examples.
- Tap a screenshot to enlarge it; tap Done to close the enlarged image.
- Use Back to return to the topic list.
TOPIC 03
Songs and Adding Music
Find, sort, open, import, receive, or carefully remove songs.
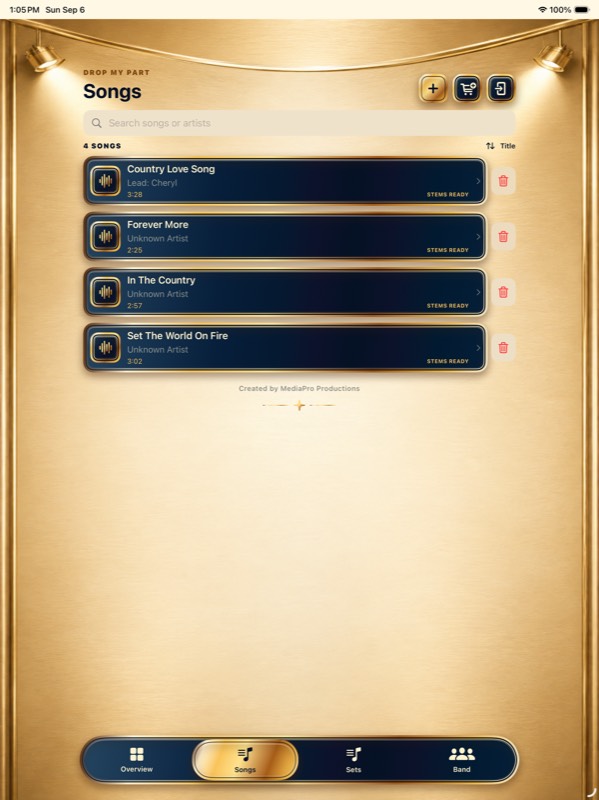
Tap Songs at the bottom.
Manage your complete music library.
Step by step
- Search by title or artist.
- Tap plus to import a DRM-free file.
- Tap the cart for buying help.
- Tap the phone-and-arrow to receive a Practice Pack.
- Change the sort when needed.
- Tap a row to open it.
- Use red trash only when you mean to remove it.
TOPIC 04
Buy and Add a Song
Search Apple’s iTunes Store, buy the correct recording, then choose its downloaded copy from Music.
Open Songs and tap the shopping cart.
Use this when you do not own a compatible song file.
Step by step
- Enter the complete title.
- Add the artist to narrow the results.
- Tap Open iTunes Store. Check the title and artist in the Store before purchasing.
- Buy and download the correct version.
- Return and tap Choose My Purchased Song.
- Choose My song is saved somewhere else when you already have a compatible file.
TOPIC 05
Playing and Practicing a Song
Play, scrub, change the mix, loop a passage, and adjust the key.
Open a song from Overview, Songs, or a set.
Everyday individual practice and difficult passages.
Step by step
- Tap the large Play triangle to start; tap again to pause.
- Use the 10-second buttons or waveform.
- Set In at a loop’s beginning and Set Out at its end.
- Tap a saved section to jump there.
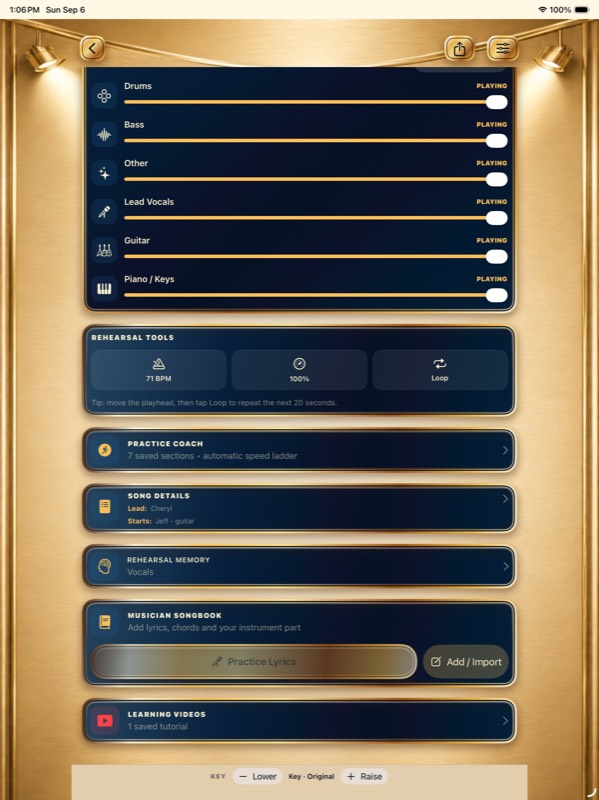
- Use the instrument sliders to balance or mute parts.
- Use Lower and Raise to change key.
- Open the feature cards for Practice Coach, Song Details, Rehearsal Memory, Musician Songbook, or Learning Videos.
TOPIC 06
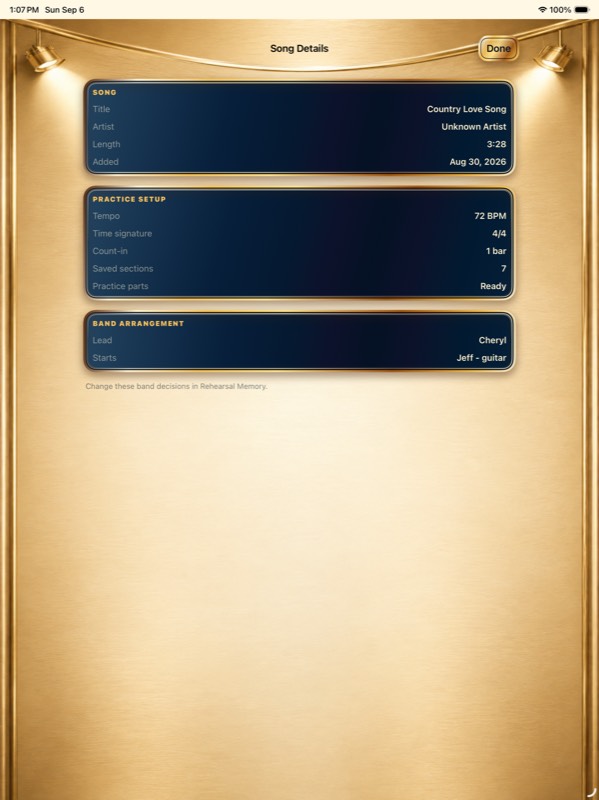
Read Song Details
Check the song’s identity and current practice setup.
Open a song and tap Song Details below the practice tools.
Check the song’s identity and current practice setup.
Step by step
- Review the title, artist, duration, tempo, time signature, count-in, and saved-section count.
- Tap Done to return to practice.
- To change tempo or timing, open the sliders button on the player. To record band decisions, open Rehearsal Memory.
TOPIC 07
Choose and Mute My Parts
Select every role you perform and control several parts with one button.
Open a song and scroll to Mute My Part.
For musicians who sing and play, or cover several roles.
Step by step
- Check every part you perform; several may stay checked.
- For example, choose Drums and Lead Vocals.
- Tap Mute Checked to remove them together.
- Tap Unmute Checked to restore them.
- Use individual controls for one part.
- Set roles separately for each song.
TOPIC 08
Save Song Sections and Loops
Save passages so you can jump to them or repeat difficult bars.
Open a song and scroll to Practice Coach.
Practice a verse, chorus, solo, entrance, or transition.
Step by step
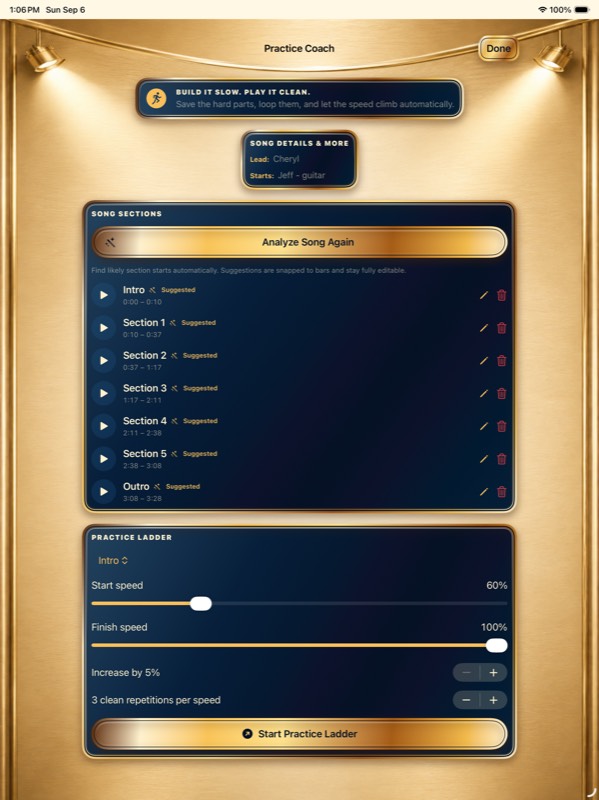
- Tap Auto-Mark Song, or Analyze Song Again if suggestions already exist.
- Listen to each suggestion using its Play button. Suggestions may need correction.
- Tap the pencil beside a section to change its name and start/end times, then save.
- Return to the player and tap a section under Start Song At to begin there.
- For a manual loop, move the playhead to its beginning and tap Set In, then move to its end and tap Set Out.
- Use Loop in Rehearsal Tools to turn repeating on or off.
TOPIC 09
Lyrics, Chords, and Musician Songbook
Keep your chart, instrument part, and notes with a song.
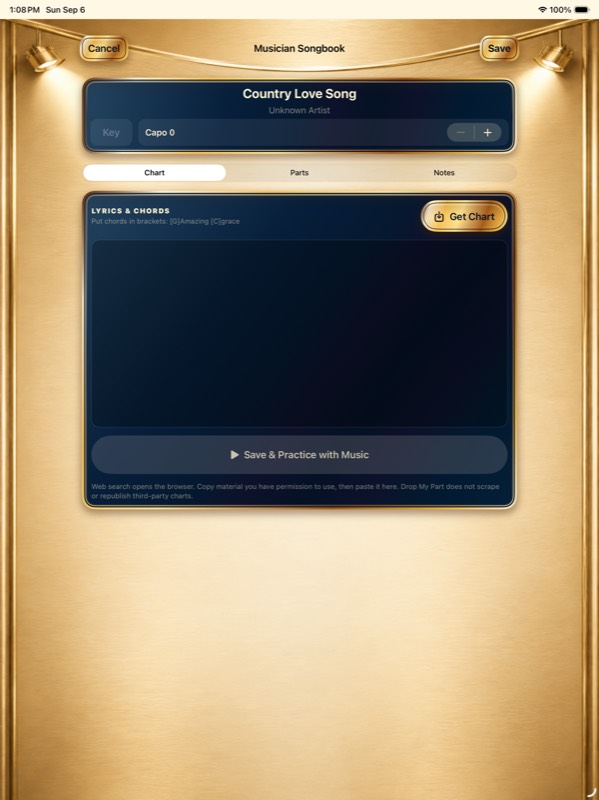
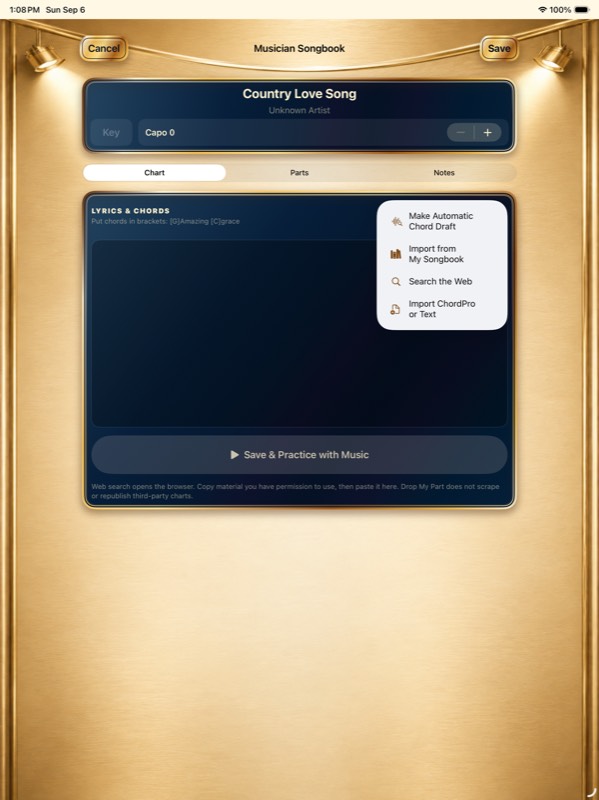
Open a song, scroll to Musician Songbook, and tap Add / Import.
Keep your chart, instrument part, and notes with a song.
Step by step
- Use Chart for lyrics and chords. Put chord names in brackets, for example [G].
- Tap Get Chart to see Automatic Chord Draft, My Songbook, web search, or ChordPro/Text import.
- Review an automatic draft and correct it before relying on it. Web search opens a browser; copy permitted material and paste it into the chart.
- Set the key and capo when needed. Use Parts for instrument instructions and Notes for reminders.
- Tap Save, or Save & Practice with Music when available. Return to Practice Lyrics to rehearse with the chart.
TOPIC 10
Practice Coach and Practice Ladder
Repeat a saved passage and increase playback speed automatically.
Open a song, scroll to Practice Coach, and open it.
Master a lick, fill, entrance, harmony, change, solo, or transition.
Step by step
- Analyze for new section suggestions.
- Tap the Play triangle beside a section to preview it.
- Edit with pencil or remove with trash.
- Choose a section in Practice Ladder.
- Set start and finish speeds.
- Set the increase and clean repetitions.
- Start Practice Ladder.
TOPIC 11
Learning Videos
Keep useful YouTube lesson links with the correct song.
Open a song and then Learning Videos.
Save tutorials, demonstrations, lessons, and useful performances.
Step by step
- Tap Find Lessons for the current song.
- Open a useful video, then tap Save Video to keep its link with this song.
- Return to Learning Videos to reopen a saved lesson.
- Use the saved lesson’s edit or delete control to update its note or remove the link.
TOPIC 12
Build and Reorder Sets
Put songs into rehearsal or performance order.
Tap Sets at the bottom.
Prepare for rehearsal, a gig, service, or event.
Step by step
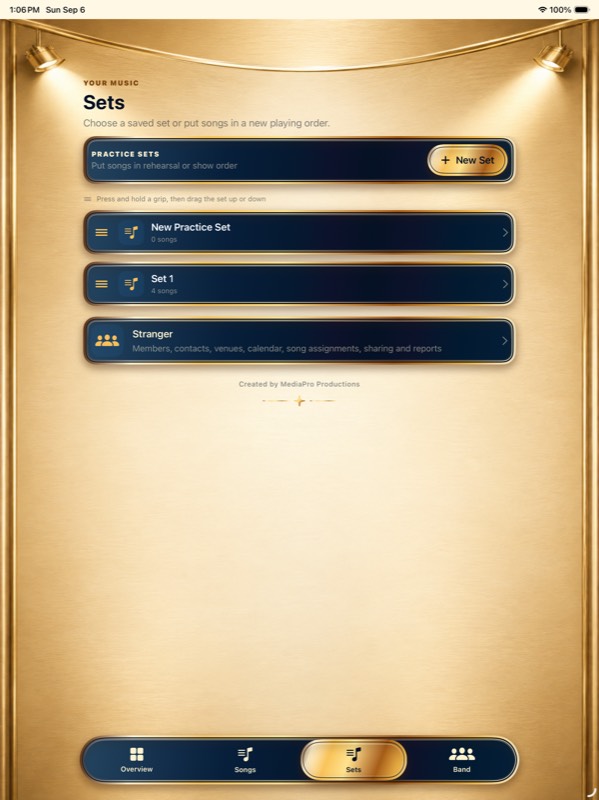
- Tap New Set and name it clearly.
- Open it and add songs.
- Choose one or more library songs, then tap Done.
- Add Show Moments between songs.
- Drag items inside the set to reorder them.
- Start Rehearsal Mode or Gig Mode when ready.
- On the Sets page, hold the orange grip and drag a whole set up or down.
TOPIC 13
Add Show Moments to a Set
Put announcements, changes, breaks, guests, or other non-song events in the running order.
Open a set and choose Add Show Moment.
Tell the band and crew what happens between songs.
Step by step
- Choose a Type.
- Write what everyone needs to know.
- Add a time estimate when useful.
- Tap Save.
- Drag the moment to the right place in the set.
TOPIC 14
Set Up the Band Hub
Keep your band’s people, plans, sets, and rehearsal decisions together.
Tap Band at the bottom.
Turn rehearsal details into information the whole band can use.
Step by step
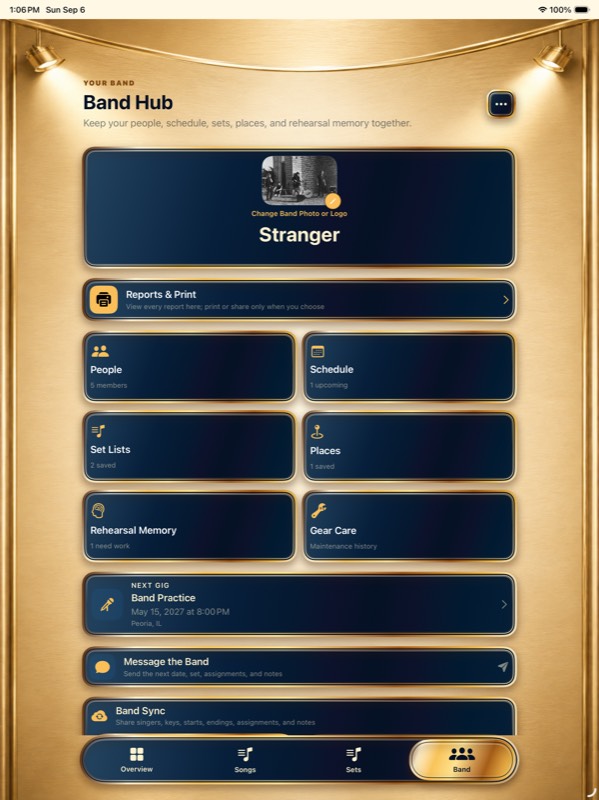
- Open Band from the bottom navigation.
- Tap Add Band Photo or Logo to choose an image. Use the band’s edit control to change its details.
- Open People, Schedule, Set Lists, Places, Rehearsal Memory, or Gear Care for that task.
- Scroll down if the tool you want is below the visible part of the screen.
- Open Reports & Print when the saved information is ready to read or share.
TOPIC 15
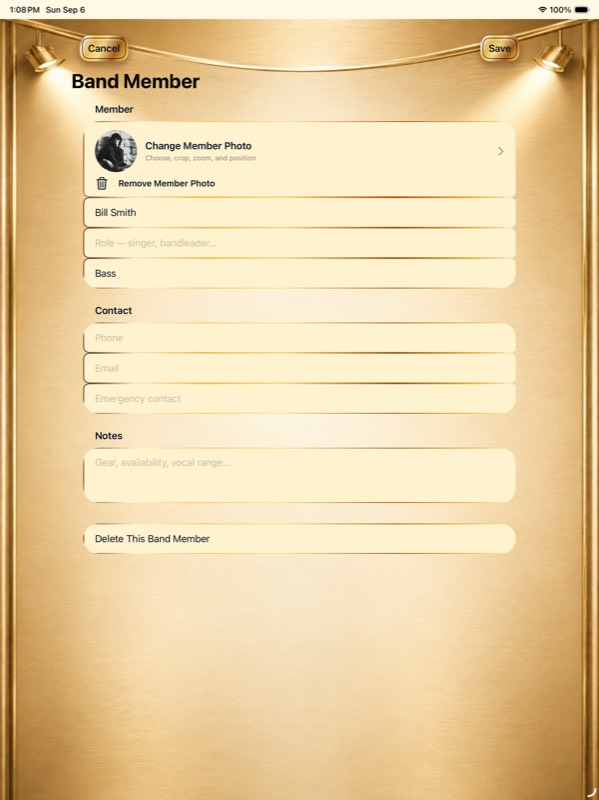
Add Band Members
Keep names, roles, instruments, and contact details with the band.
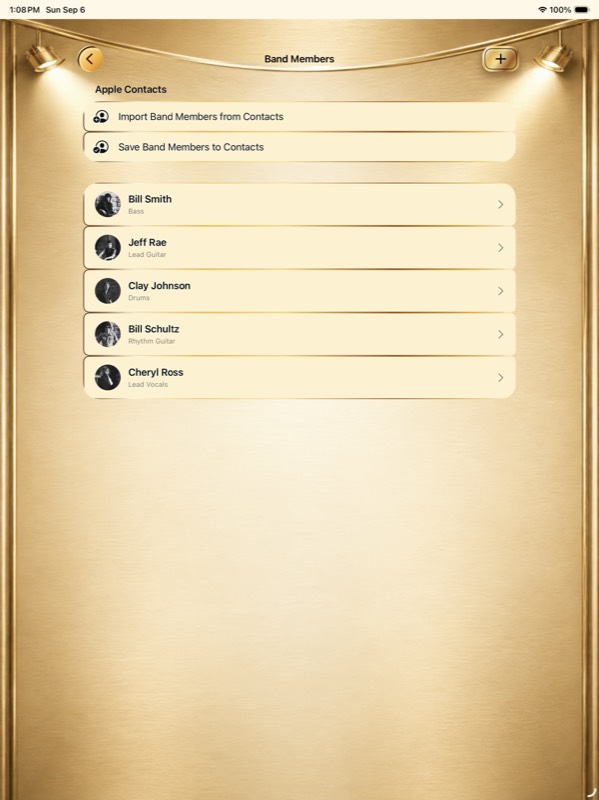
Open Band → People.
Keep names, roles, instruments, and contact details with the band.
Step by step
- Tap + to add a musician and fill in their details.
- Save the member, then repeat for the other musicians.
- To use existing contacts, choose Import Band Members from Contacts and select the people you want.
- Use Save Band Members to Contacts only when you want to add those details to Apple Contacts. Review any permission or confirmation shown.
TOPIC 16
Schedule a Practice or Gig
Record when and where the band meets and which set to use.
Open Band → Schedule, then add or open an event.
Record when and where the band meets and which set to use.
Step by step
- Enter the event name and choose its Type.
- Set the start and end dates and times.
- Choose a saved place or enter a custom location.
- Attach the practice set and write an agenda or other notes.
- Tap Save. Use Review and Add to Calendar if you also want an Apple Calendar event.
TOPIC 17
Record Gear Care
Keep maintenance history and the next service date.
Open Band → Gear Care and add a record.
Keep maintenance history and the next service date.
Step by step
- Enter the gear or instrument and what was done.
- Set the Completed date.
- Turn on Set a next-service date if another service is planned, then choose that date.
- Add useful notes such as string gauge or parts used, then tap Save.
- Use Reports & Print → Gear Care Report to review saved maintenance information.
TOPIC 18
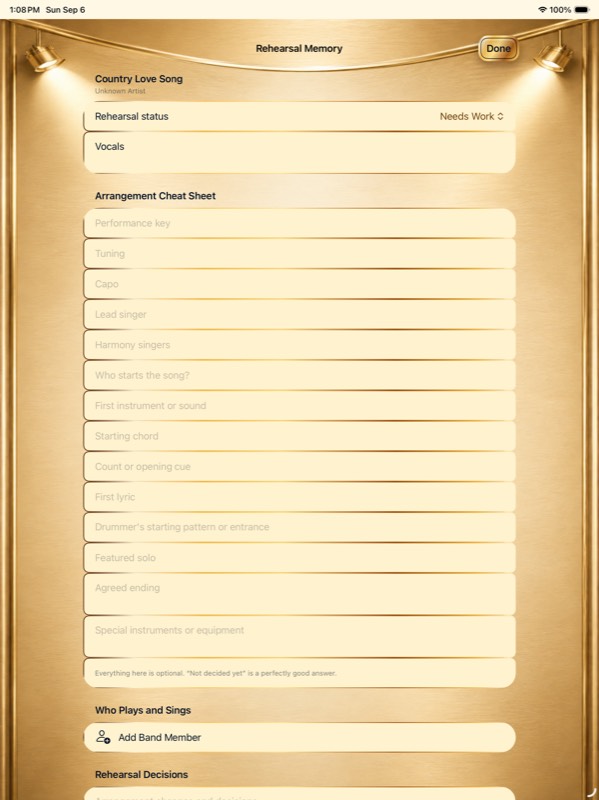
Remember the Arrangement
Record the key, singers, first sound, count, cues, ending, assignments, and next problem.
Open a song, scroll down, and tap Rehearsal Memory.
Save decisions the band should remember next week or on stage.
Step by step
- Choose Learning, Needs Work, or Gig Ready.
- Write one specific next problem.
- Record key, tuning, capo, and singers.
- Record who starts, first sound, chord, count, and cue.
- Add lyric, drummer entrance, solo, ending, equipment, and decisions.
- Tap Done.
TOPIC 19
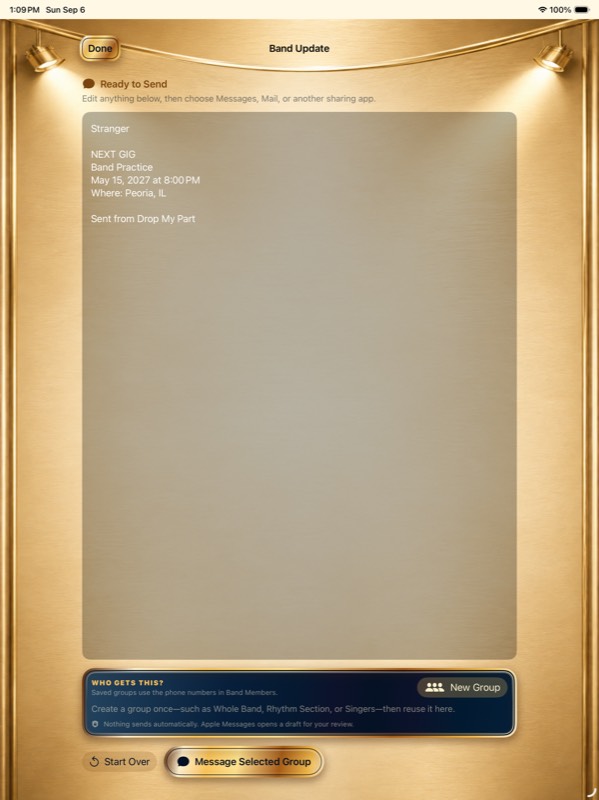
Message the Band and Share Data
Create readable messages, Band Sync files, and Practice Packs; nothing sends until you choose where.
Open Band for messages and Band Sync; use Share on a song or set for Practice Packs.
Send the plan, editable band details, or permitted audio and parts.
Step by step
- Prepare and review Message the Band.
- Choose a saved recipient group or create one.
- Use Send Update for Band Sync.
- Use Receive to import an update.
- Use Share for a Practice Pack.
- Use AirDrop for large packs.
TOPIC 20
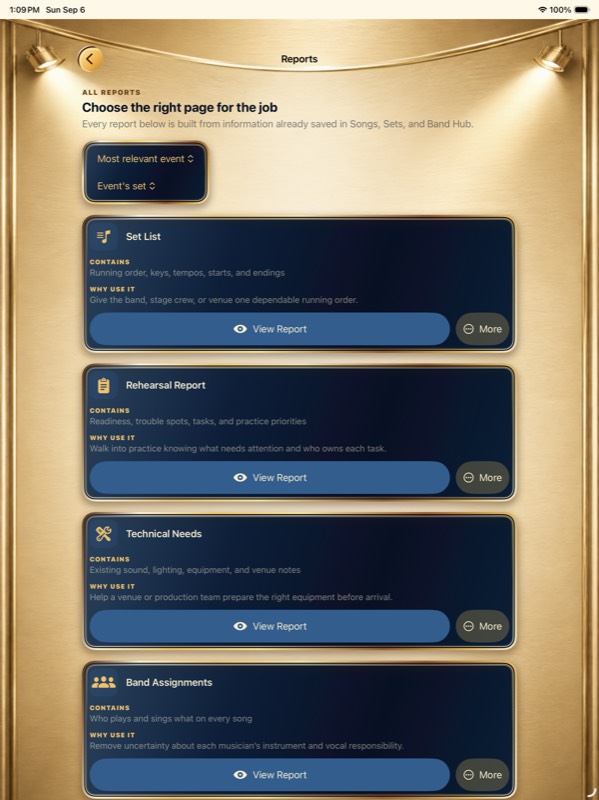
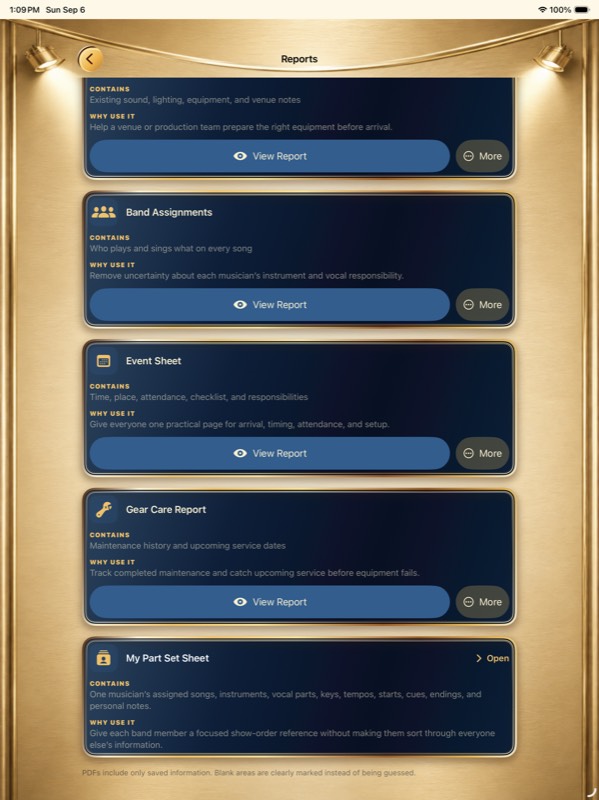
View, Share, and Print Reports
Read saved band information in the app, share it as a PDF, or print only when useful.
Open Band and tap Reports & Print.
Prepare for rehearsals, gigs, venue communication, assignments, or maintenance.
Step by step
- Open Reports & Print in Band Hub.
- Choose the set and, when available, the event that the report should use.
- Tap View Report on the report you need. For My Part Set Sheet, tap Open and choose the musician and set.
- Use More for the available sharing and printing actions. Review the preview before sending or printing.
- If information is missing, close the report, update the source song, set, event, or band details, then open the report again.
TOPIC 21
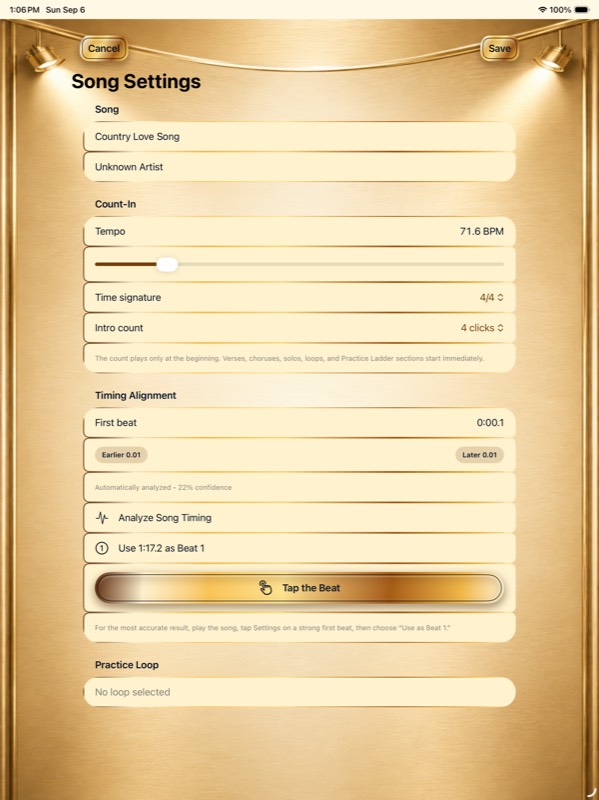
Fix Count-In and Beat Timing
Tell the app where Beat 1 occurs so practice tools line up with the recording.
Open a song, tap sliders, then find Timing Alignment.
Correct an early or late count, wrong tempo, or section snapping.
Step by step
- Try Analyze Song Timing.
- Use Earlier or Later for fine changes.
- For a large change, play to a downbeat and use the current time as Beat 1.
- Tap the beat to correct tempo.
- Choose time signature and count.
- Save and test from the beginning.
TOPIC 22
Test Mode and Protecting Your Data
Explore a separate fictional band while your real songs and Band Hub remain hidden and unchanged.
From Overview, tap the gear.
Safely explore messages, reports, contacts, calendars, maps, sharing, and band tools.
Step by step
- Turn on Use Test Mode.
- Look for the yellow banner.
- Explore fictional information.
- Outside actions remain local previews.
- Turn Test Mode off to return to live information.
STILL NEED HELP?
Tell us what happened.
Include your iPad model, system version, Drop My Part version and build, and the last button you pressed.
Email MediaPro Productions