Get ready
Have Final Cut Pro, a folder of video clips, and one local song file ready.
MEDIA TOOLS FOR WORK THAT MOVES
Beat Cut Assistant turns your footage and soundtrack into a reviewable, beat-driven rough cut for Final Cut Pro.
A macOS utility for editors who want a musical starting point, not a blank timeline.
Rhythm-led selection — map your clips to the pulse of your music.
Built for review — approve the best moments before the edit leaves your desk.
Final Cut ready — export a rough-cut FCPXML and keep your craft in Final Cut Pro.
BEGINNER-FRIENDLY GUIDE
You do not need to be a Final Cut expert. This guide explains every file you need, every button to click, and where to find the finished edit. We will use a child's birthday party as the example.
Have Final Cut Pro, a folder of video clips, and one local song file ready.
Watch each suggested moment, make small adjustments, then keep it or skip it.
Beat Cut builds a new, editable timeline with your music and chosen moments.
The Final Cut extension is already inside the app. There is no second download and nothing else to install.
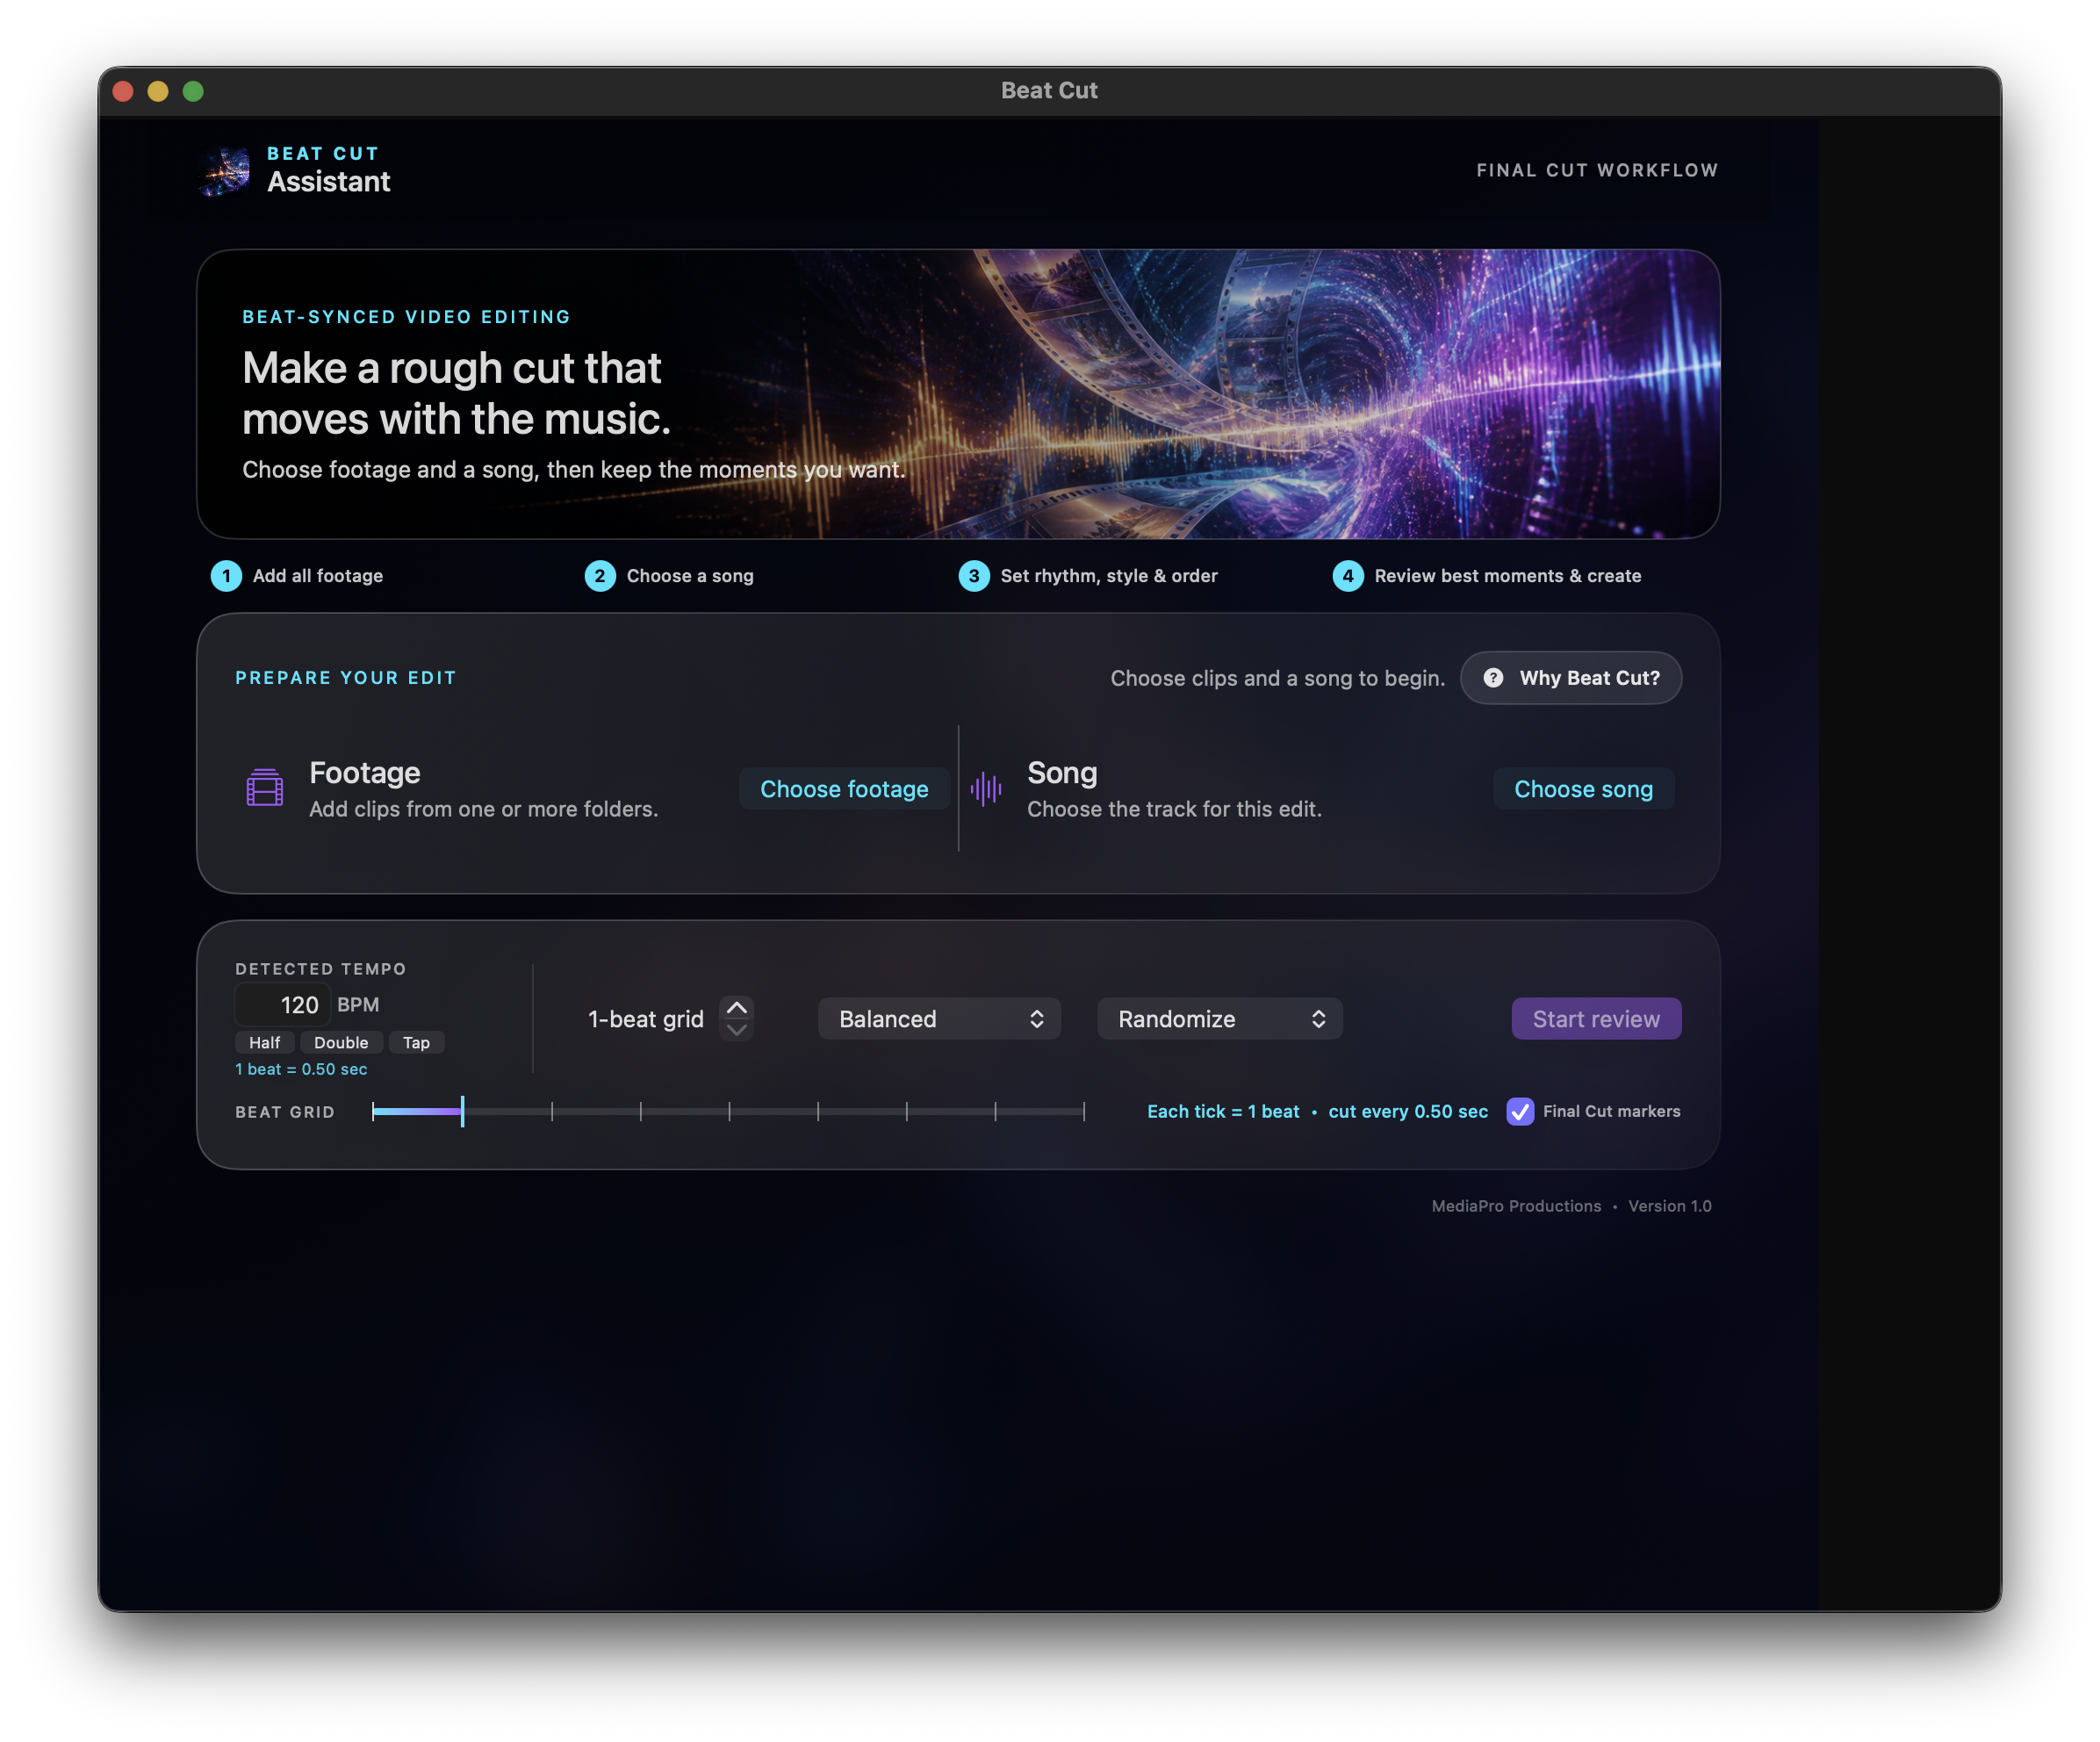
If you do not see the Extensions button, use the menu bar at the top of the screen and choose Window → Extensions → Beat Cut Assistant. Beat Cut opens in a floating window inside Final Cut.
If Final Cut was open while Beat Cut was installed: Quit Final Cut completely, reopen it, and check Extensions again.
Final Cut calls its main working file a Library. It is simply the place where Final Cut keeps your events, projects, and timelines.
You do not need to create a project or timeline. Beat Cut will create those for you. If you already have a Library open for this video, you can use it instead.
You can also select individual clips or more than one folder. Beat Cut reads the files but does not change or delete the originals.
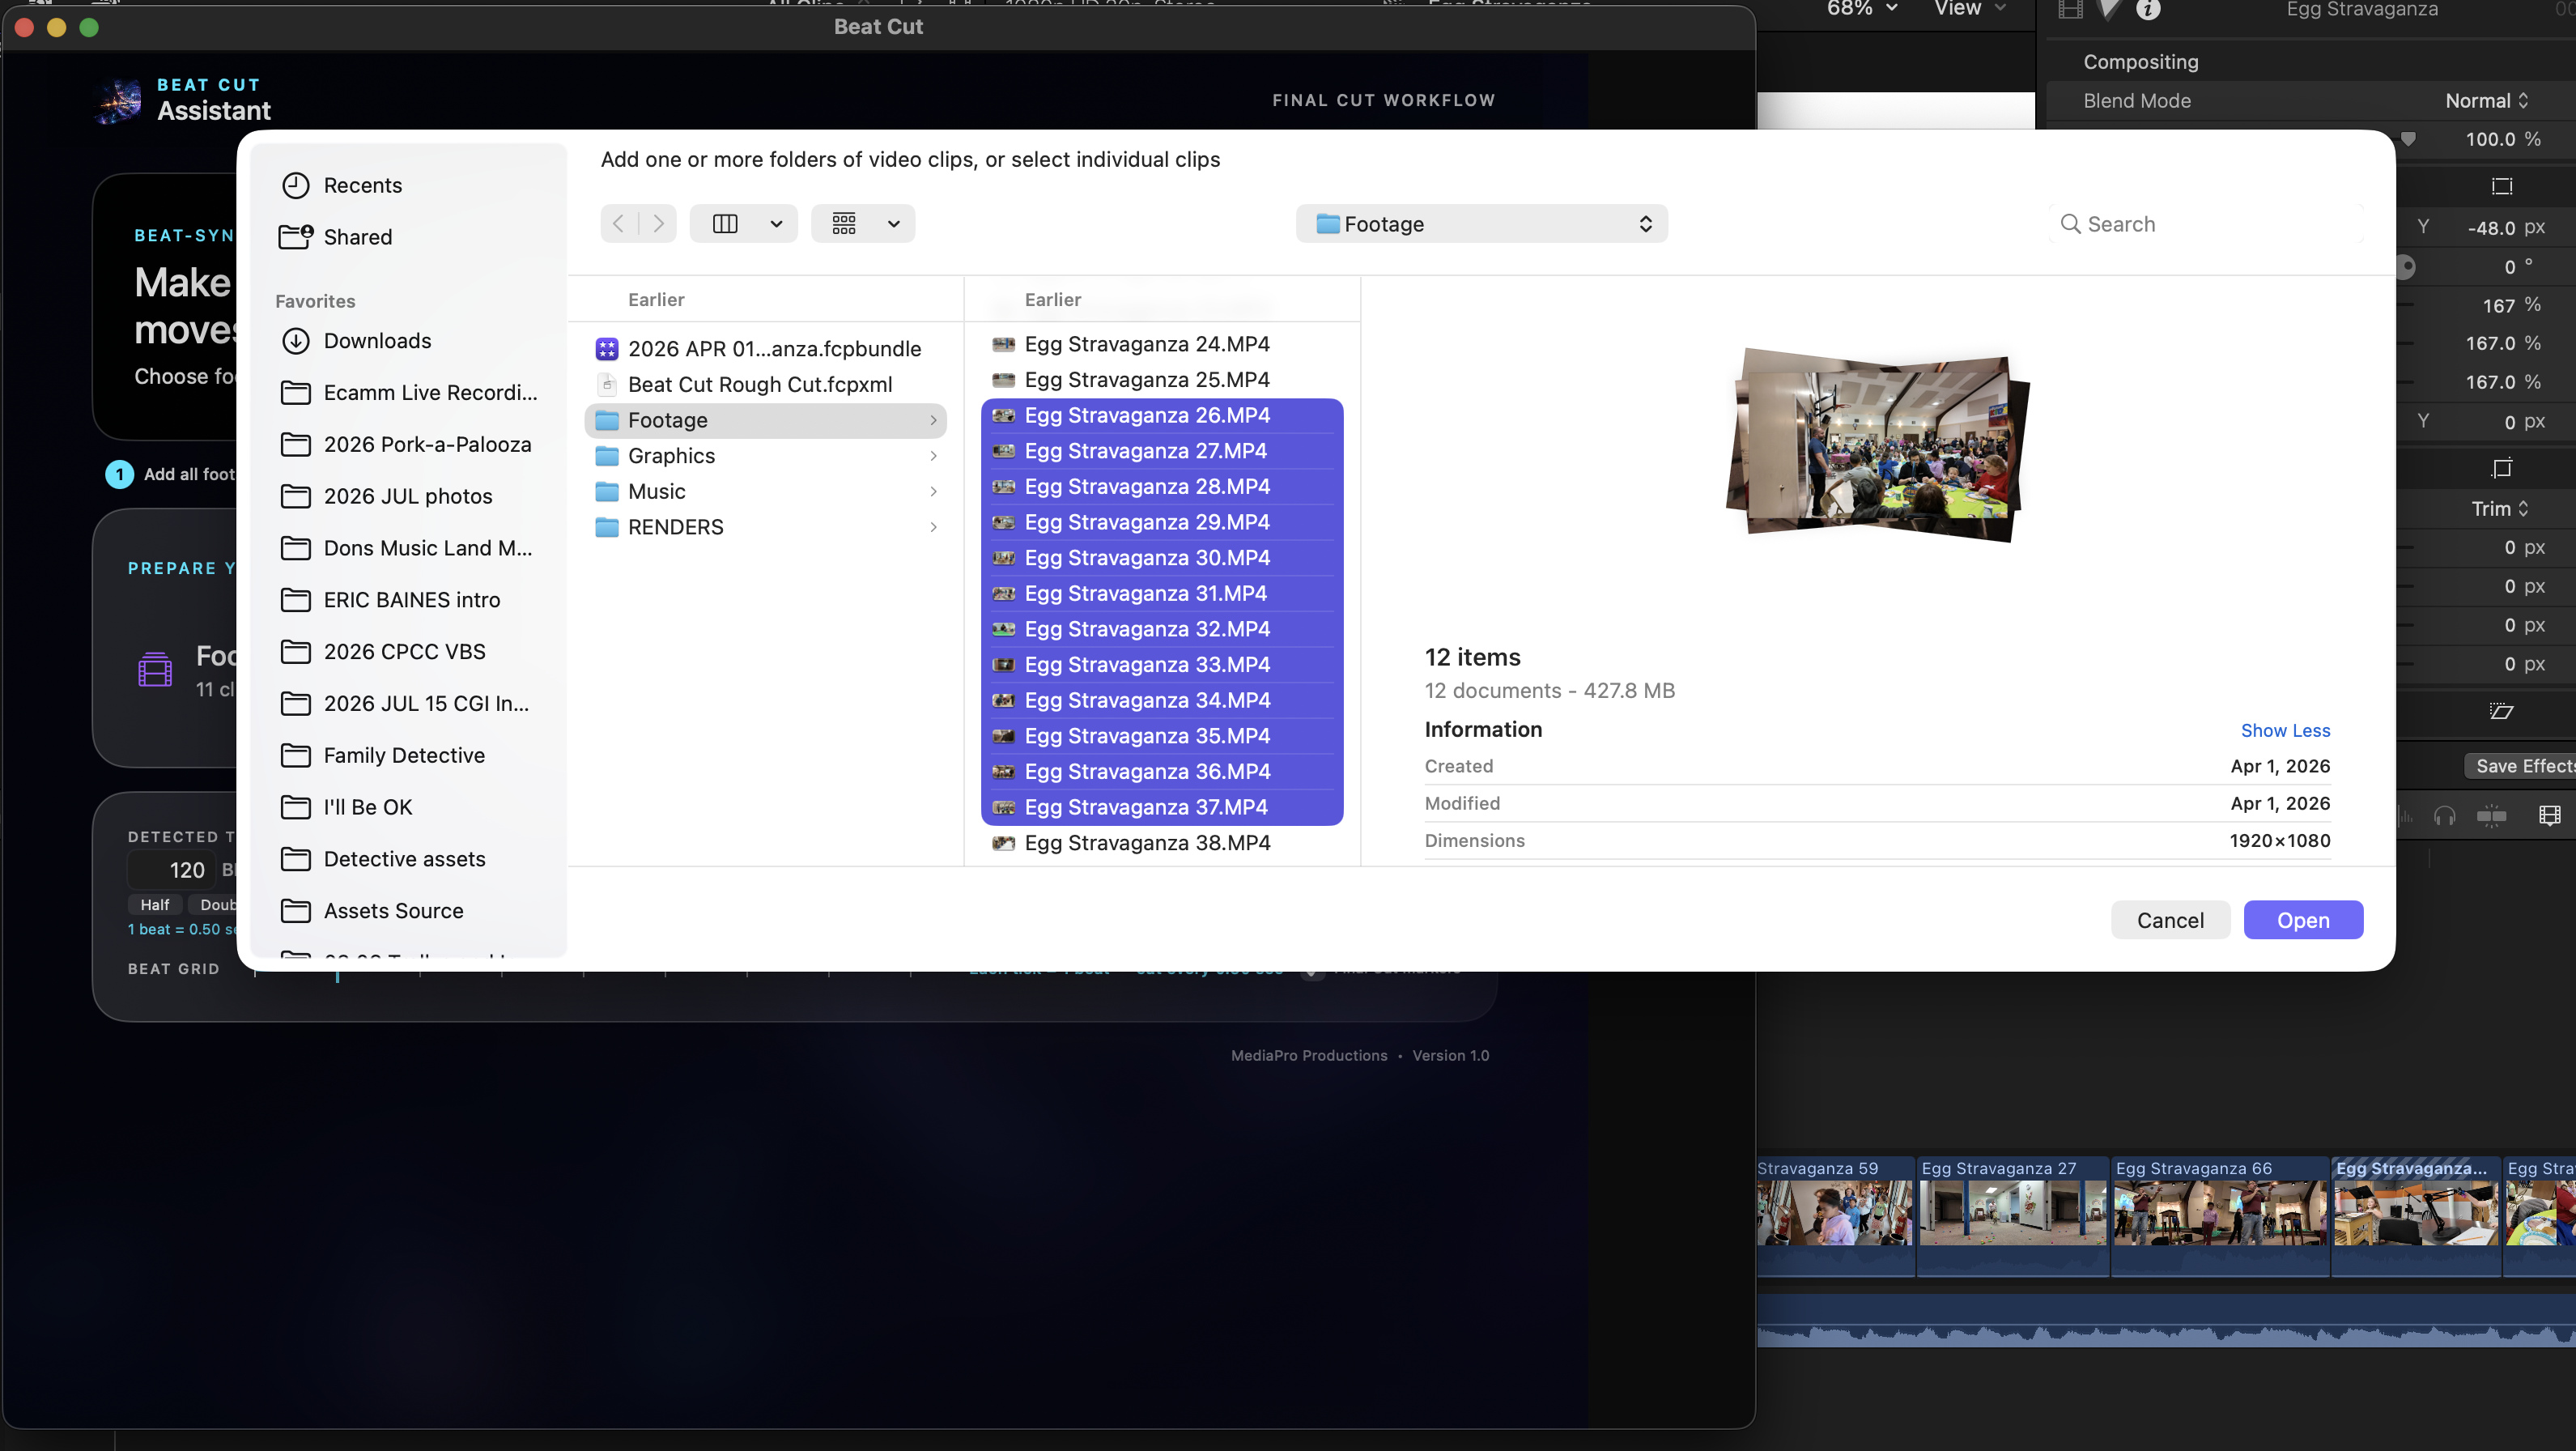
Birthday-party example: Select the clips of guests arriving, children playing, candles being lit, the birthday song, and the child opening presents.
The tempo appears as a BPM number. BPM means beats per minute. For a first edit, it is fine to leave the detected number alone.
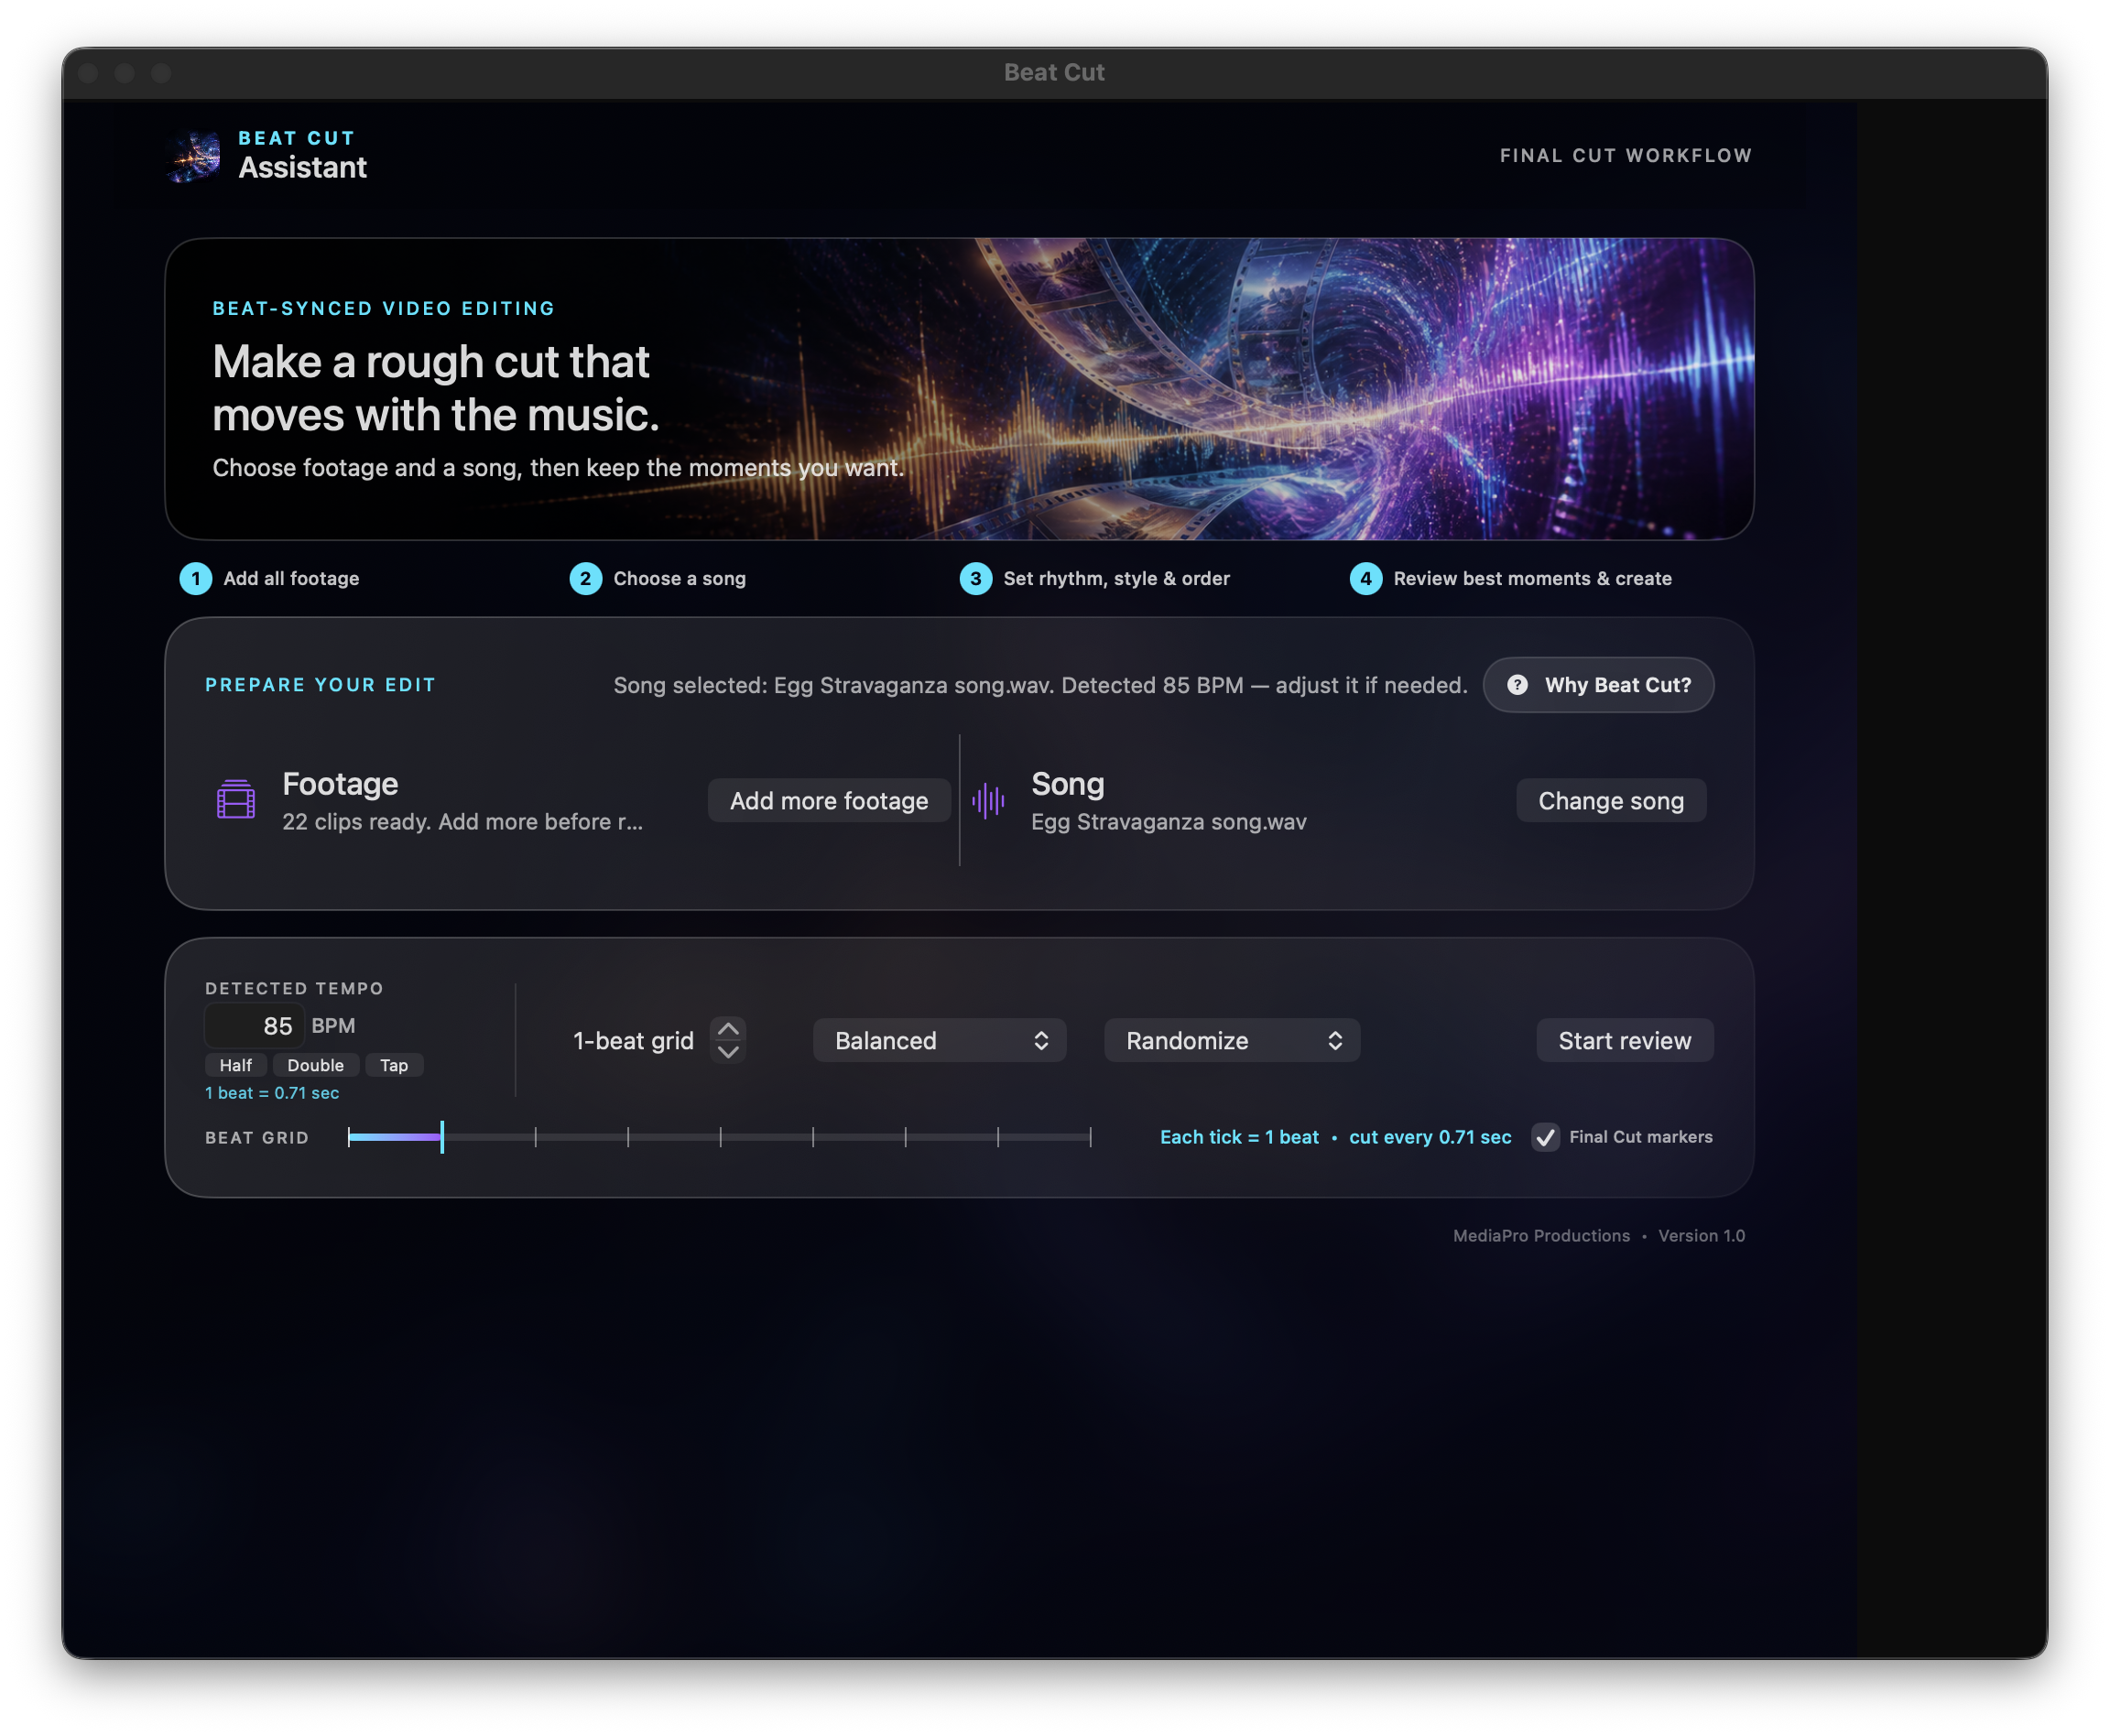
These controls tell Beat Cut how to build the first edit:
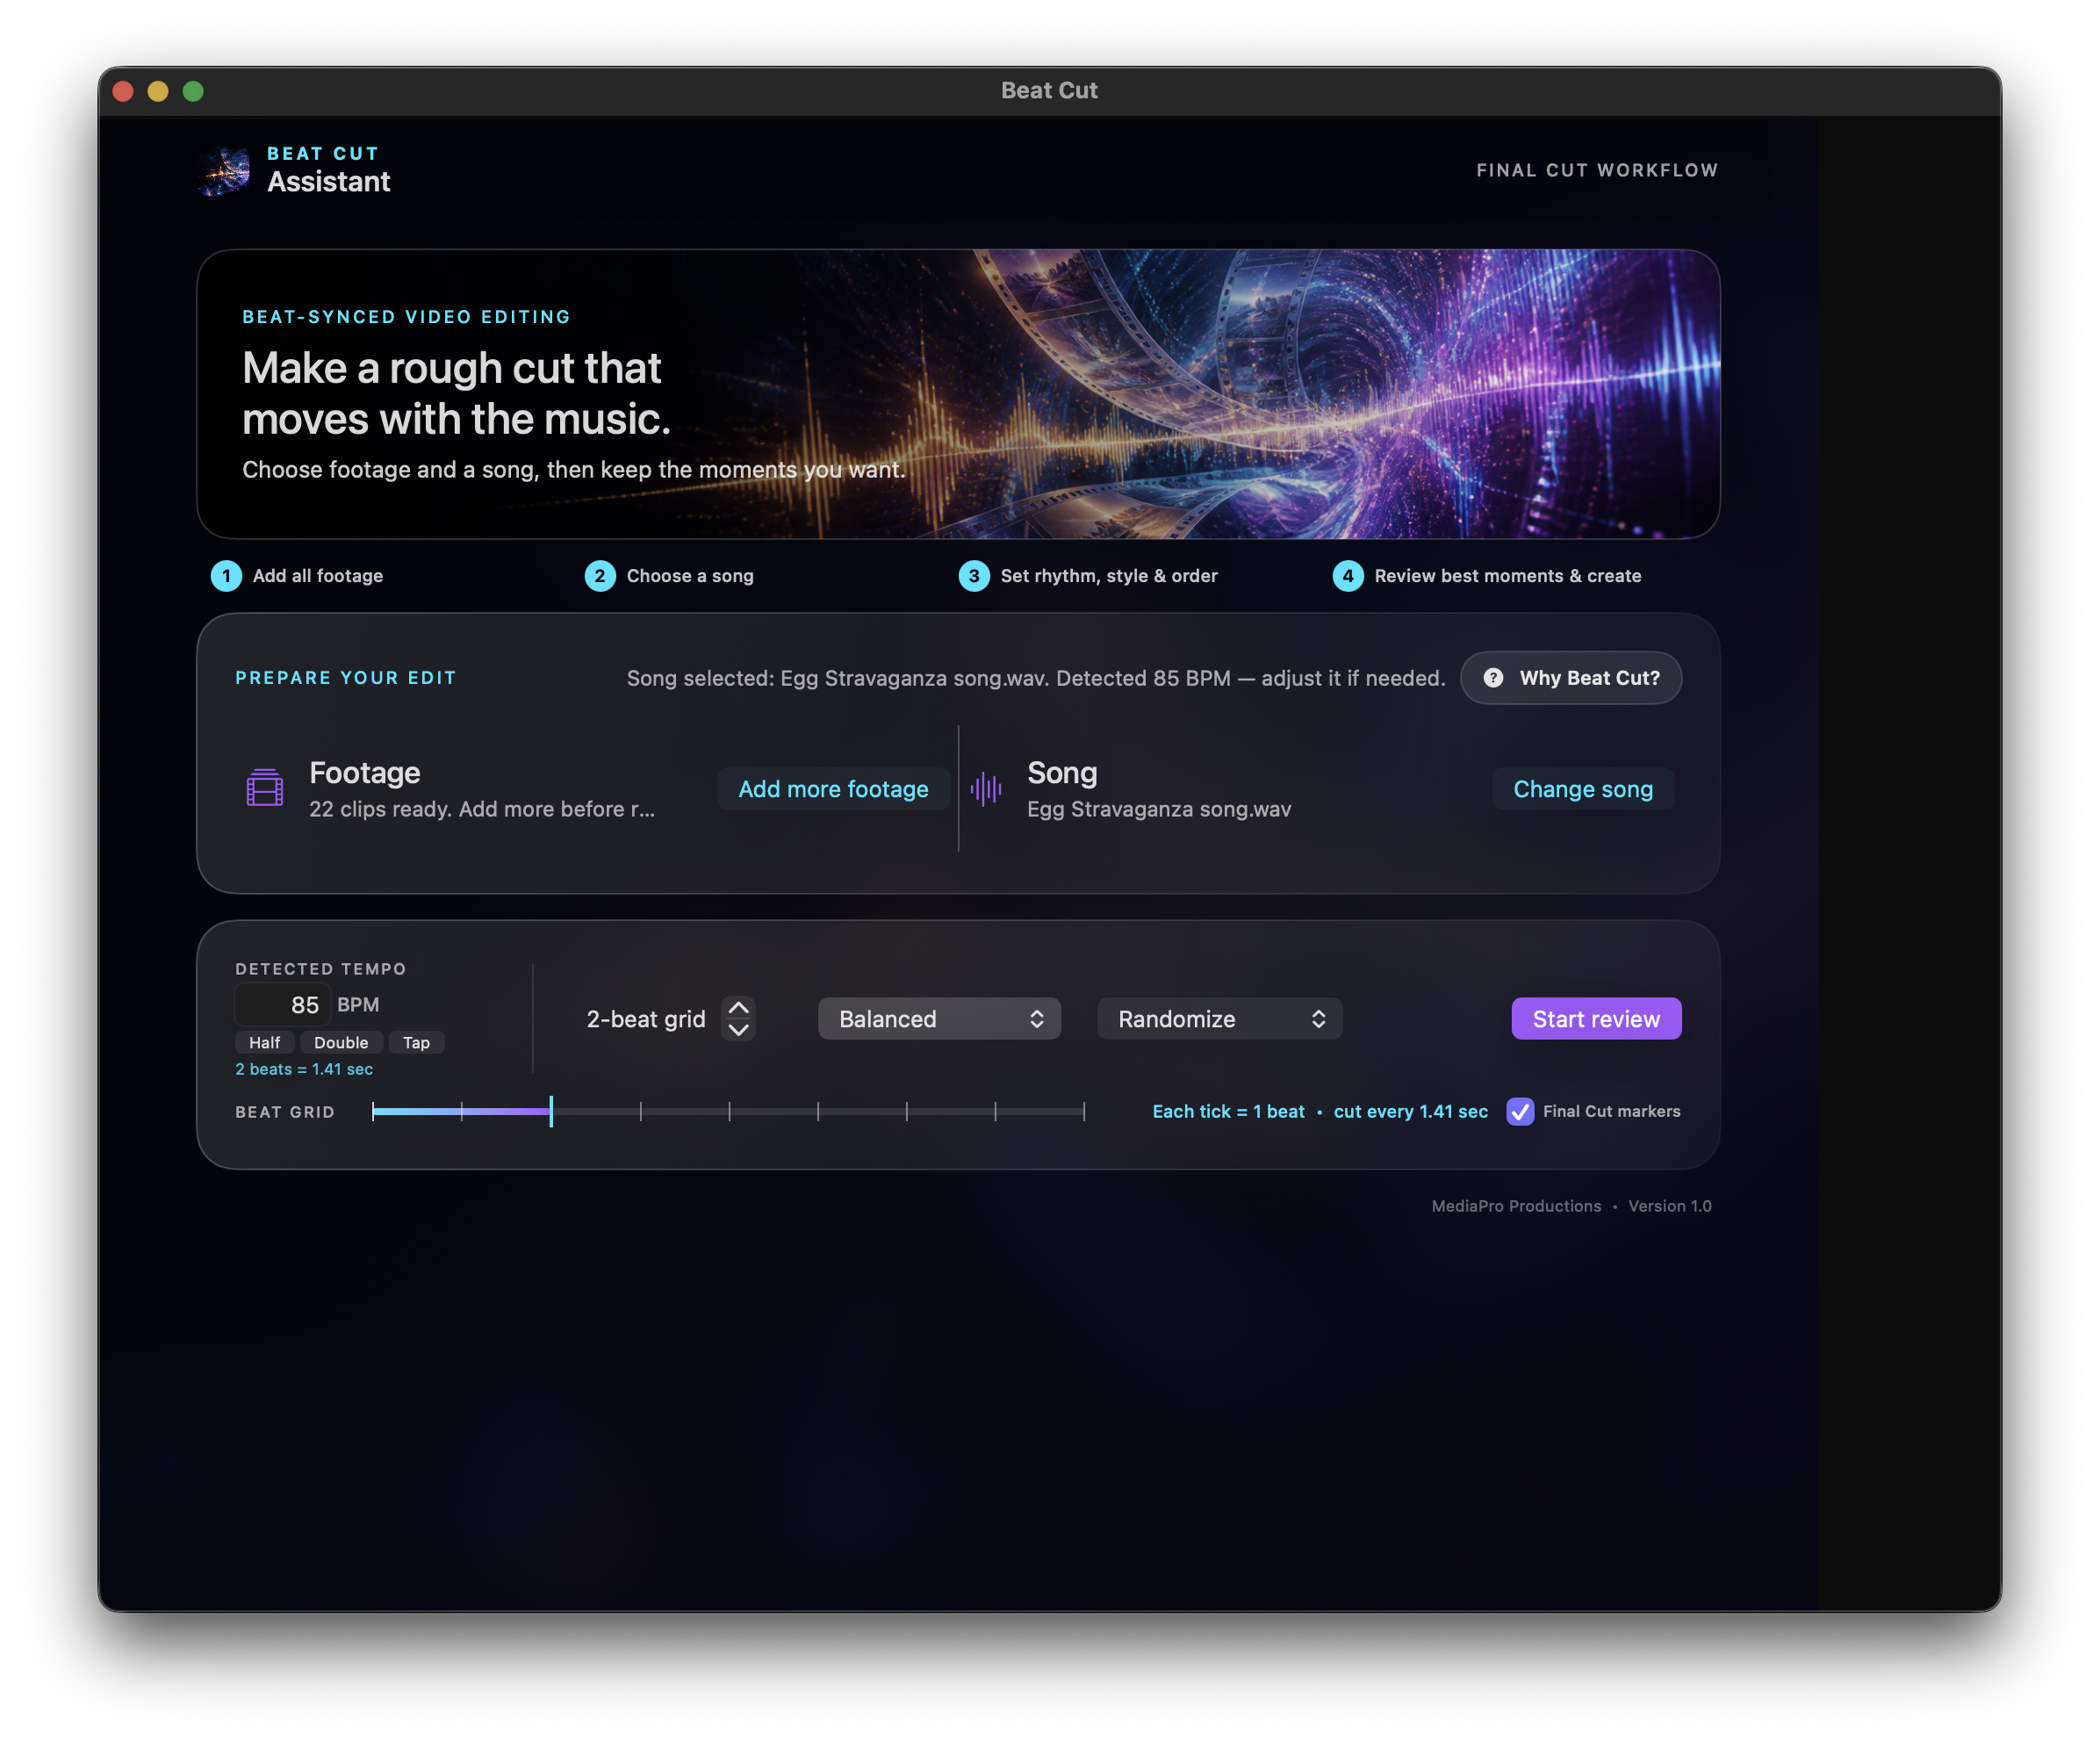
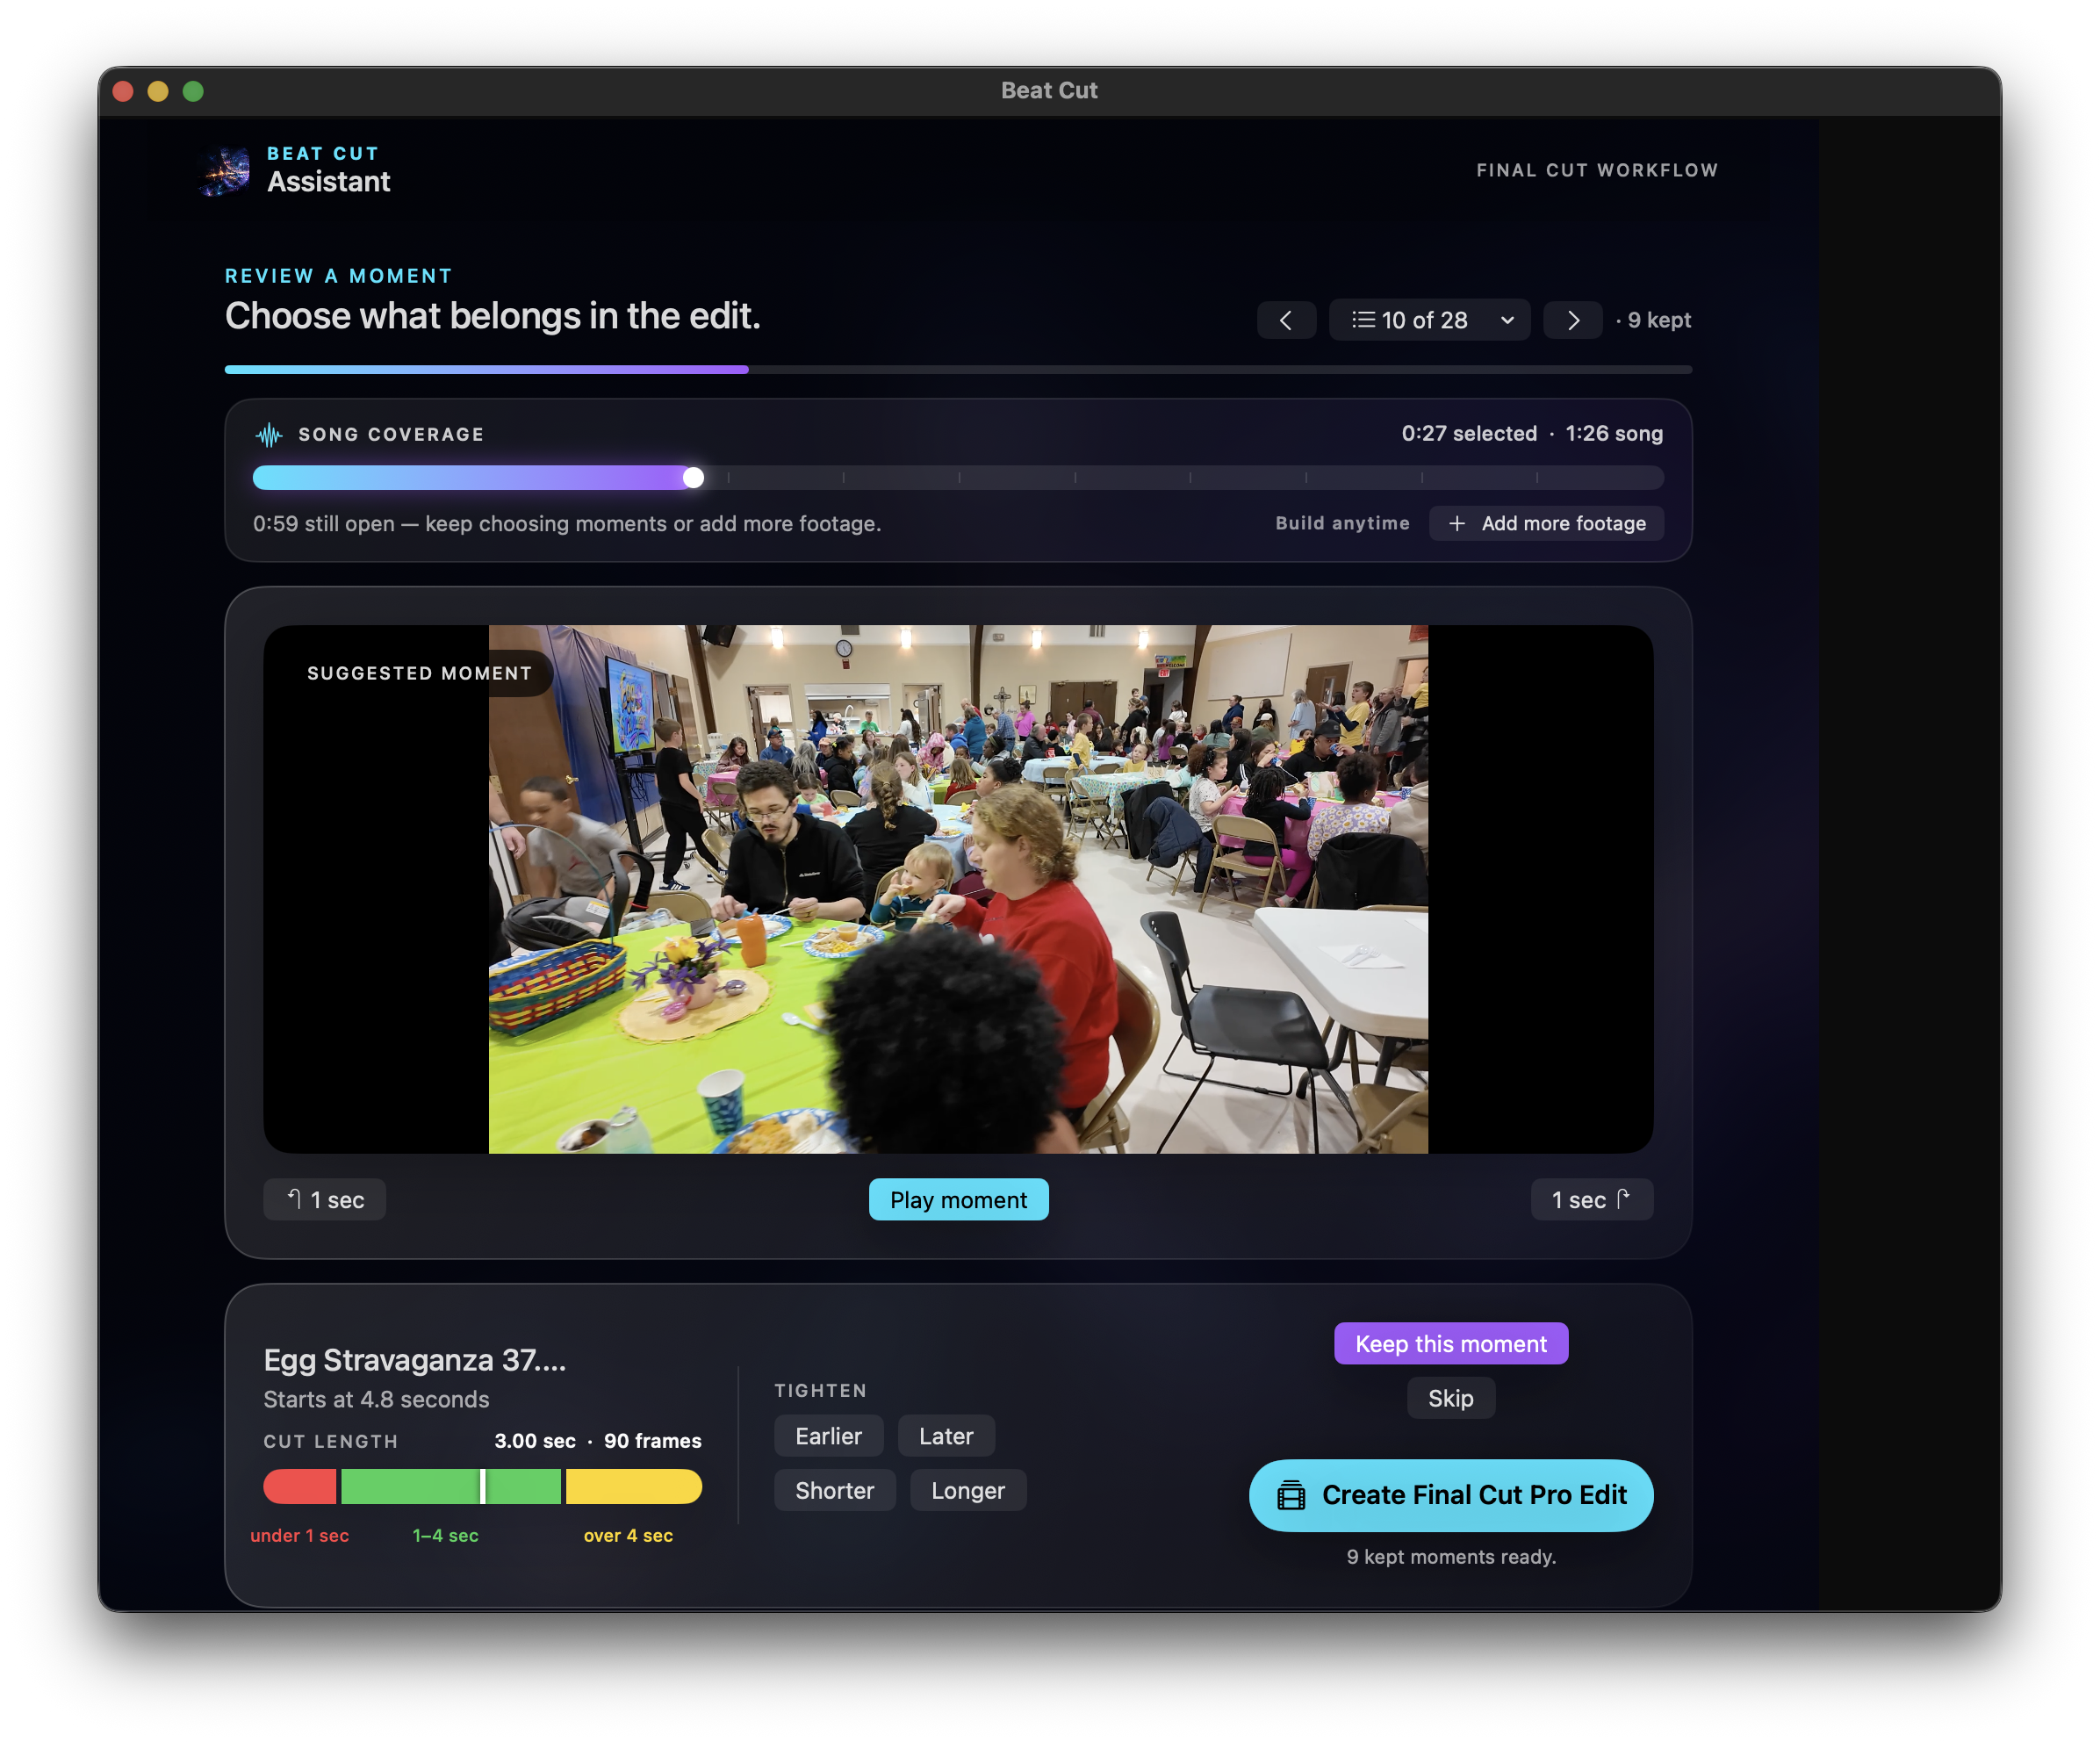
Birthday-party example: Keep the candle-blowing, cheering, laughing, and present-opening moments. Skip a blurry shot or a moment where the camera points at the floor.
The FCPXML file is not a finished movie. It is a small instruction file that tells Final Cut how to build the new timeline from your original clips and song.
If nothing opens automatically: In Final Cut, choose File → Import → XML, then choose “Beat Cut Rough Cut.fcpxml” from the Desktop.
The timeline contains the song and the moments you kept. If Final Cut Markers was turned on, the music also has markers showing the beat positions.
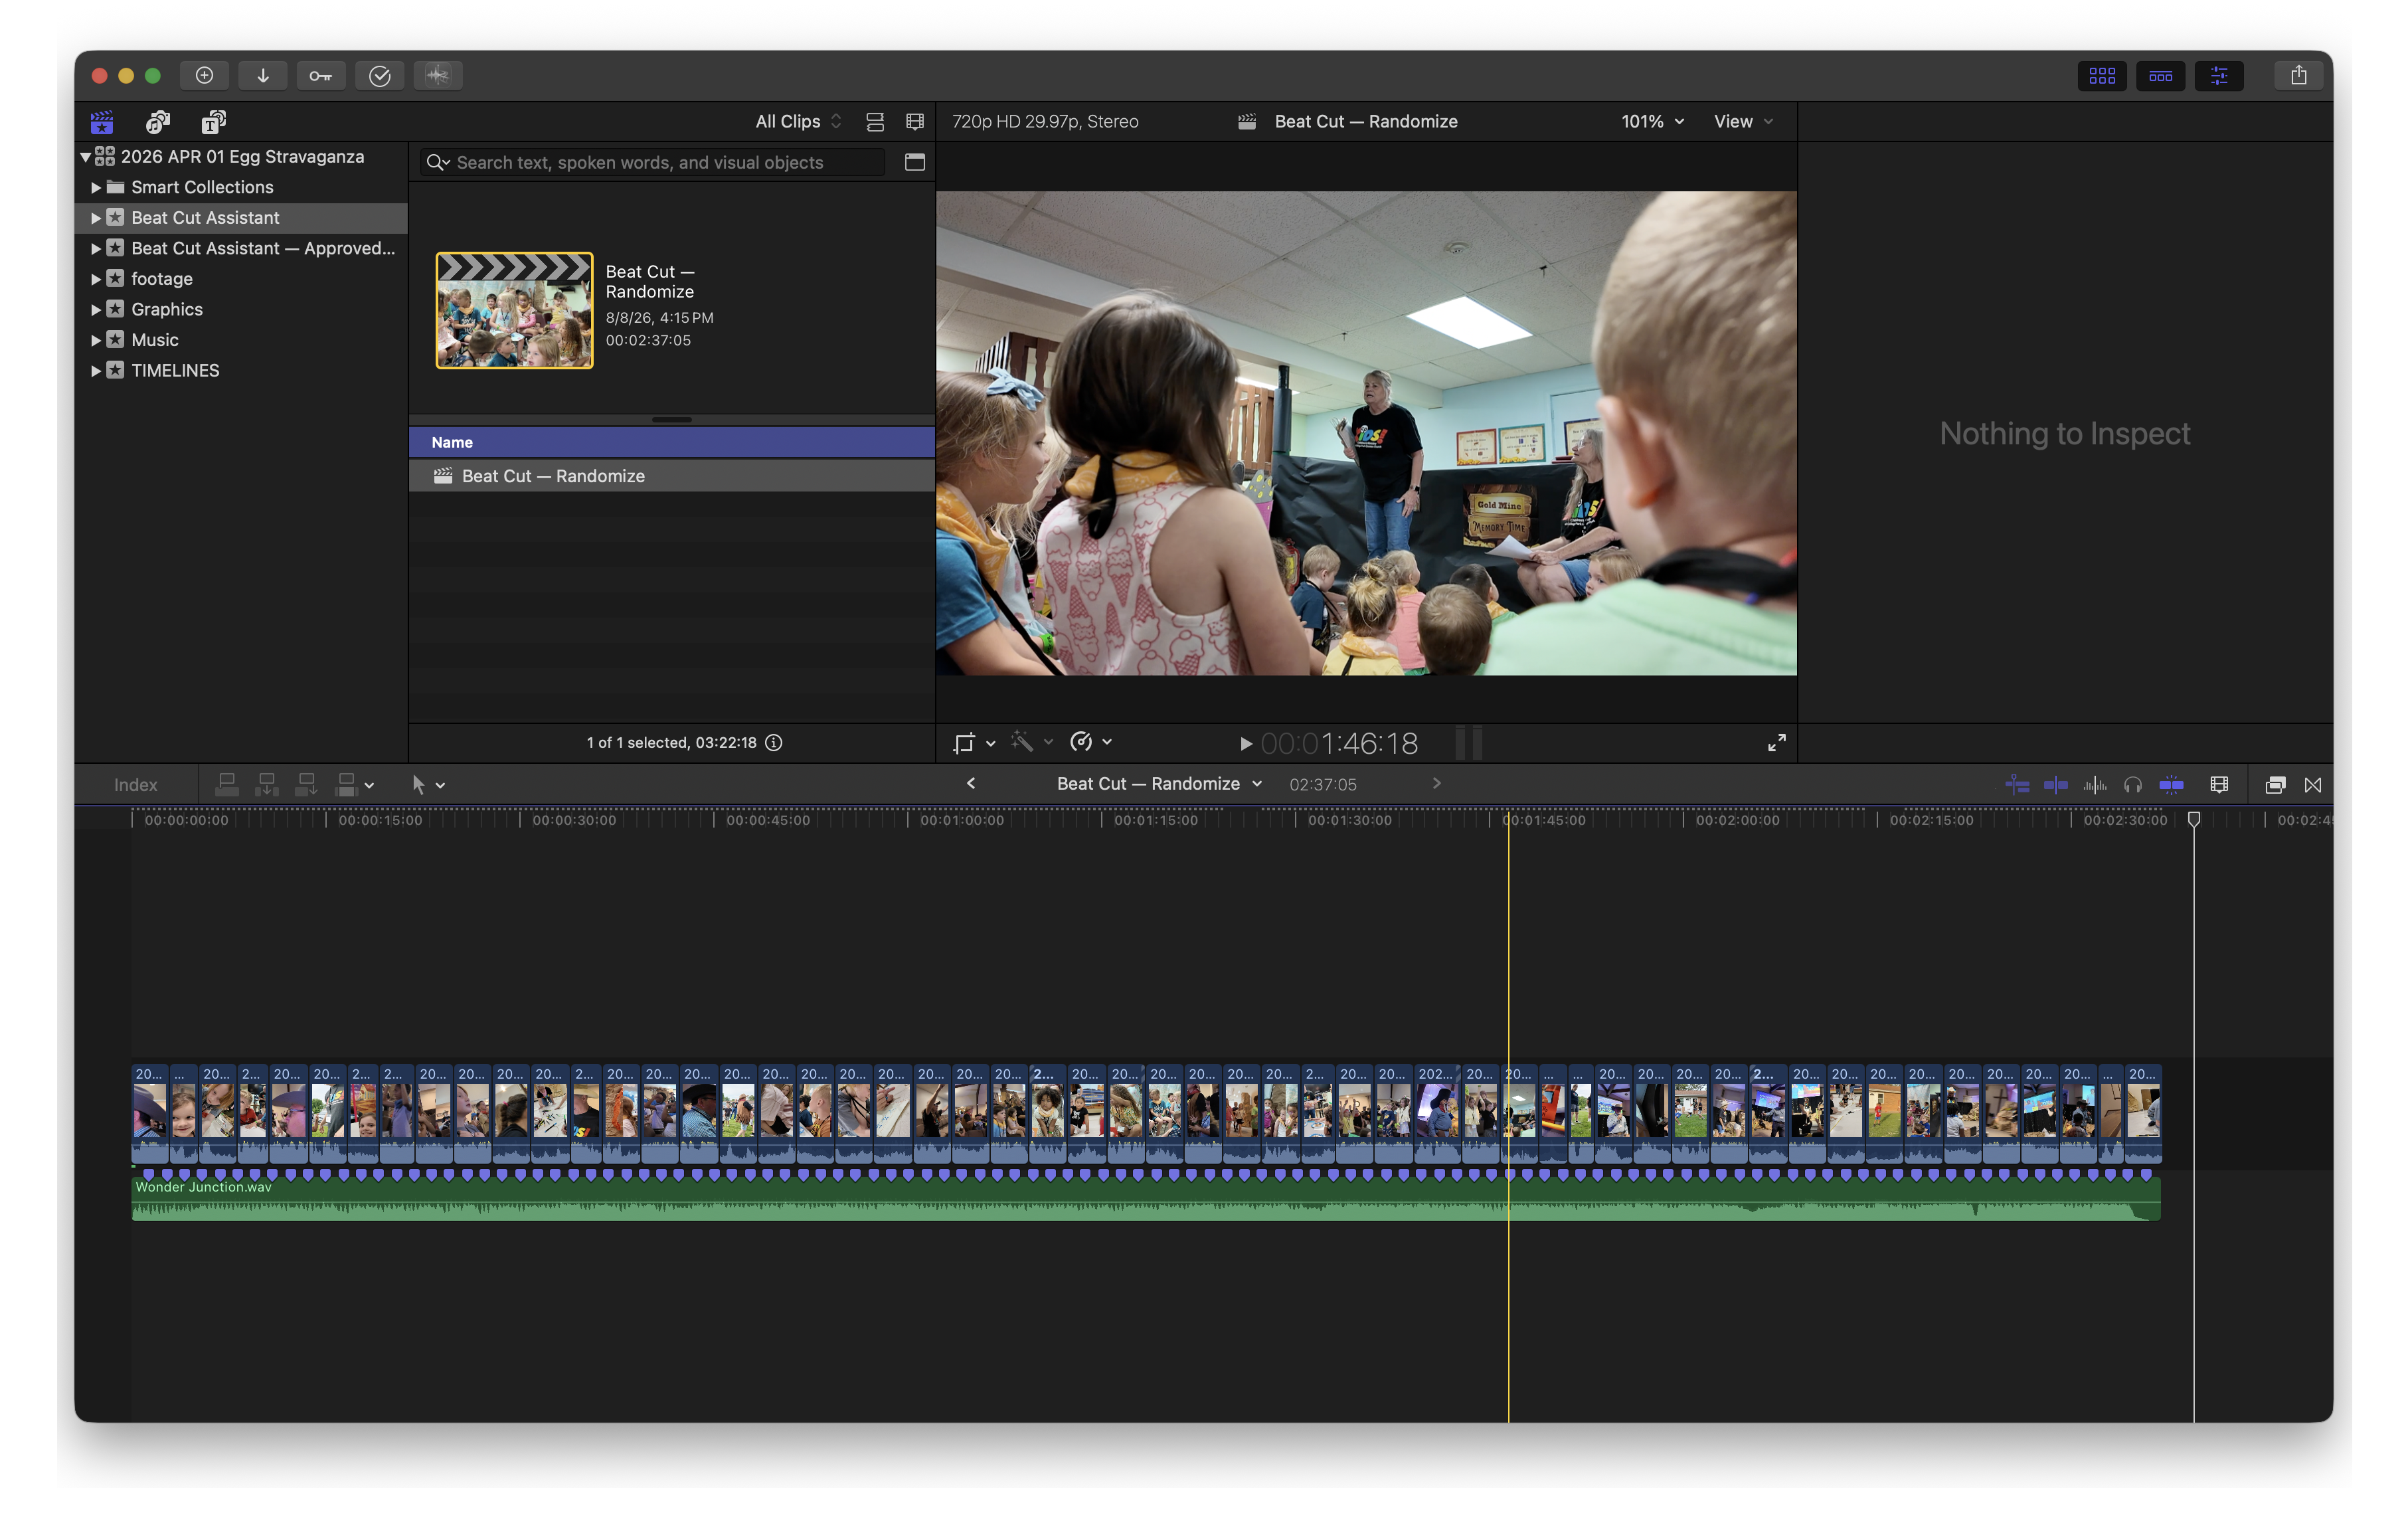
The edit is still completely adjustable. Move clips, replace clips, change the cut points, add titles, adjust the music, and finish the video the same way you would edit any other Final Cut project.
Birthday-party example: Add the child's name and age as a title, lower the music where someone is speaking, and add the final family photo at the end.
After the import works: You may delete the “Beat Cut Rough Cut.fcpxml” file from the Desktop. Keep the original video clips and song where Final Cut can still reach them.
SUPPORT & FAQ
Beat Cut Assistant runs on macOS 13.5 or later and works with Final Cut Pro. It creates a rough-cut project for you to refine in Final Cut Pro.
No. Your source clips remain unchanged. The app creates an editable Final Cut Pro project that refers to your original media.
Use File › Import › XML in Final Cut Pro and choose the FCPXML file created by Beat Cut Assistant. Keep the original video files in their original locations.
Email mediaproproductions@email.com. Include your macOS version, Final Cut Pro version, and a short description of what happened.
POLICIES & SUPPORT
Effective August 8, 2026. MediaPro Productions, a DBA of Clayton Johnson, publishes Beat Cut Assistant. The app works with the video clips and music files you choose on your Mac to create an FCPXML rough cut. Your media is processed locally on your Mac; the app does not create an account, upload your selected media, or collect analytics about your editing work.
If you email support, we receive the information you choose to send, including your email address and message. We use it only to respond to your request. Apple handles App Store purchases and may process information under its own privacy policy. Questions? Email mediaproproductions@email.com.
Effective August 8, 2026. Beat Cut Assistant is licensed, not sold, for your personal or internal business editing use. You may not copy, modify, resell, rent, lease, or reverse engineer the app except where law permits. You remain responsible for the media you choose and for having the rights to use it.
The app is provided as-is to help create an editable rough cut; review every resulting project before delivery or publication. To the extent allowed by law, MediaPro Productions is not liable for indirect or consequential loss arising from use of the app. Purchases and eligible refunds are administered by Apple. These terms do not limit rights that cannot legally be limited.